 mcld.co.uk: Dan's recipe book
Contents:
The man in the little Turkish shop got excited when I bought a tin of coconut milk and a fennel. "Oh, are you making fennel soup?" "...No?" But then he persuaded me, telling me how he used coconut milk to make it creamy and rich.
What I love is that the "grassy" fennel flavours actually balance against the coconut milk well, so the end result is rich but makes perfect sense. I emphasise the fennel-ness with the other herbal flavours of dill seed and lemon zest.
Serves 2, takes 30 minutes.
Rinse the fennel. If your fennel has dill-like sprigs of "hair" on, cut them off and save them to use as garnish at the end.
In a large pan with a lid, melt the butter over a medium heat, while you slice the fennel fairly finely. Start the fennel frying, adding the dill seed too, and let it fry (with stirring) until it only-just starts to take a bit of golden colour (not too much!).
Meanwhile boil a kettle, then add about 400ml of boiling water to the fennel to cover it. Add about 1/2 a teaspoon of salt too. Bring it to the boil, and let it bubble modestly for about 10 minutes.
Meanwhile, chop the courgette, and zest the lemon. When the fennel is nicely softened, add the courgette and give that just a couple of minutes to soften. Add the parsley. Then take the pan off the heat and, using a blender, whizz it all to a nice smooth consistency. It's up to you whether you blitz it to uniformity or you leave some different-coloured bits in it.
Return the soup to the pan if you took it out. Add the coconut milk - maybe not all of it, hold some back for now and maybe add the rest according to taste. Add the lemon zest, add salt and pepper. Stir it and check the seasoning.
Serve in bowls, with the garnish on top if you have it, with bread on the side.
"Stamppot" is the Dutch way of making a big hearty mashed-potato dish for the autumn/winter months. It's good to serve it with something savoury and "meaty" like a sausage, which contrasts against the texture and flavour of the mash -- but of course we want a veggie version. I invented this lovely umame-packed miso mushroom ragout which works superbly and is no trouble to make.
I also used an old crust of bread to add to the mushrooms and it made a fabulous addition as chewy chunks. Ideal for this is for the bread to be crusts rather than the middle, for it to be old (and thus dry), and also something tasty like a sourdough. It becomes almost meaty in texture when used in the way we do here.
Two veg that Dutch people often add to their mash are witlof (a kind of endive) and kale. We used both, but it doesn't matter much, use what's available. The endive has a more interesting slightly bitter flavour. If you don't have endive, then plenty of kale is also fine.
Serves 2, takes 25 minutes.
For the stamppot:
For the mushrooms:
To serve:
Prepare the ingredients. Wash the potatoes and chop them into ~2cm dice. (I didn't peel mine - you can choose.) Chop the bread into ~1.5cm dice. Clean the mushrooms, then slice them not too thinly e.g. half a centimetre. Slice the witlof, also to about half a centimetre slices. Chop/slice the onion finely.
Boil a large amount of water. Put the potatoes into a big pan with the boiling water and boil them for 20 minutes. Note that you'll be adding more to this pan - but for now, move on to prepare the mushrooms.
In a good-sized frying pan on a medium heat, melt half (25g) of the butter and start the onion frying. After a minute add the mushrooms too. Fry these for a couple of minutes. No need to stir too much.
The pan will dry out, as the mushrooms absorb the liquid. You can then add the other 25g butter to the pan, let the butter melt, and then stir the bread cubes into this mixture too. Once the bread has started to fry, turn the heat down to medium-low, and continue frying but be careful not to let it burn.
It's probably now about time to add the chopped witlof to the potatoes that are boiling (about half-way through, i.e. with 10 minutes remaining). Do that, and the kale too, and stir. Continue to boil this until the potatoes have had their 20 minutes.
Meanwhile, back to the mushrooms. Mix the miso paste with 200ml of boiling water. Once the bread has taken on some colour, add the miso broth to it, plus the maggi sauce. Let this little stew bubble gently for the remaining five to ten minutes. The water will get soaked up quite quickly. Keep an eye on it add add more if it gets too dry.
Once the potatoes are cooked, turn off the heat on both pans. Drain the potatoes and veg, then return them to the pan, add the 50g butter, and mash them with a masher, to a smooth mash.
Serve each portion as a big blob of mash, with the mushrooms laid on top, and a bit of something fresh on the side e.g. a few salad leaves. (I served mine with some fresh soy beans, which adds freshness and also a bit more protein.)
Porridge is great for breakfast, especially now as the days get shorter here in the northern hemisphere. I don't usually favour Felicity Cloake's so-called "perfect" recipes but for once with the porridge, she gets it right. So here's my slightly tweaked (veganised) version, with a couple of details that she elided.
(Consider also this very complete porridge page from an actual Scot!)
Serves 2. Takes 15--20 minutes plus optional pre-soaking.
Soak the pinhead oats in the water overnight if you can, in a medium saucepan (with plenty of room - you'll cook the porridge in this). Otherwise, just start off by bringing them up to the boil together.
Add the rolled oats and the oat milk, and when it comes back up to the boil, turn the heat down and simmer gently, uncovered, for 10--15 minutes. Stir it as continuously as you can (I use a metal chopstick, not the traditional wooden spurtle). Watch it to make sure it doesn't boil over.
Add the salt near the end of that simmering time, or whenever you want.
When it's almost ready you can put the lid on and let it sit (with the heat off) for a few minutes. And/or you can add some flavour ingredients that need to be mixed through or warmed up.
I would add maybe 1 tsp of sugar to this if I'm serving it with fruity toppings, to help bring out the fruits' sweetness. And otherwise - well it's up to you.
Toppings ideas: Dark choc and dried cherries (schwarzwalde!). Grated pear with cherries and flaked almonds. Golden syrup. Jam.
Only recently, we discovered that you can make tasty flatbreads quickly -- and shockingly easily! This recipe is great for any time you realise you haven't got flatbreads/wraps/pittas/roti/tortilla in the house, but thought you did... So, this is the "emergency flatbread" recipe!
Keep it simple. You can memorise these ingredients!
These amounts make ONE flatbread, e.g. to accompany one person's meal. You can multiply the numbers easily to make more. It takes less than 5 minutes of active work, once you've got the hang of it, and it can fit in with whatever else you're cooking.
Put the flour in a medium-sized bowl, and add the water and salt. Mix these together with a fork (or the fingers of one hand) until it gets difficult (this only takes about 10 seconds).
Then add the oil (not too much!), and use one hand to mix this well, pushing and kneading it. You don't need to "knead" it like a risen bread, you just need to get it to form a single smooth lump with no dry bits or wet bits. Since flours are often different, you may need to add a bit more flour or water. I don't.
Put a lid on top of the bowl (e.g. a plate) and leave this to sit for a short while (20 minutes, or less), to let the flour and water get properly incorporated. Leaving it for this time should help to produce a flexible flatbread. You can skip this resting if you're really in a rush - the result will be OK but might be more difficult to roll out. During the resting time, you could prepare your toppings.
Heat a flat frying pan over a hot oven hob. You want it to be hot, so the bread will cook quickly without becoming crisp. Don't add any oil. REMEMBER: hot pan, no oil.
Divide the dough into balls, one ball per flatbread.
Using a rolling pin, roll each ball out to a flat disc, as thin as you can. Mine are about 25cm across. You do need them to be quite thin, because if they're too thick they'll be a bit uncooked in the middle, and inflexible. They don't need to be perfectly circular, as long as there are no thick bits. REMEMBER: keep it thin!
Now cook them in the hot dry pan for about 30 seconds each side. You do the two sides a bit differently, so let me spell this out:
For the first side, don't press the bread down. But you can shake the pan a little to help loosen it. While it's cooking you can sprinkle a teaspoon of olive oil over it. (That will cook nicely when you flip the bread over.) Again, not too much fat/oil, do not add enough to make the pan wet.
Don't cook the flatbread too long or they'll become crisp and inflexible. REMEMBER: just 30 seconds each side should be enough, since the pan is HOT.
For the second side, DO press the bread down. Use the back of a spatula to push the bread against the hot pan, focussing on any bits of the bread that look a bit more undercooked (e.g. zones that didn't touch the pan properly). REMEMBER: press them down to get them cooked!
Now repeat this process for each of the flatbreads you want to cook.
Serve the flatbreads pretty quickly so they're nice and warm!
EXTRA RECIPE NOTES:
This simple millet and pulse dish is adapted from the recipe "chana dal pulav" by Vijaya Venkatesh. It's a delighfully fragrant fluffy indian dish, which can be a simple one-pot meal or can be an accompaniment for a nice fragrant curry (e.g. a korma, or kofte with sauce).
It's also handy if you're cooking for someone who can't eat onion/garlic.
I've written up my own version of this recipe in order to make clearer some of the steps involved. I also used dessicated coconut in place of coconut cream and liked the effect. I also used kodo millet - you can use any millet (probably!) but I like this hulled kodo millet with its white colour and very pure taste.
Serves 2. Takes 25 minutes, plus an hour of pre-soaking time.
Soak the the millet in plenty of cold water, and the chana dal in hot water (e.g. from a boiled kettle), both for an hour or more. Drain them (separately). Try to get the chana dal very dried off, to make the next stage easier - I did this by draining them in a sieve, then on some kitchen paper.
In a medium saucepan with a lid, warm up the oil, and add all the ingredients from jeera to chilli powder one after another. Temper them - i.e. fry them for a minute or so until they become fragrant.
Add the drained dal and sauté for a minute on low heat, stirring occasionally to make sure they don't stick.
Add millet, salt, coconut and water - do measure the water, you need to get it right. Give a good mix.
Put the lid on, bring it almost to boiling, then turn the heat right down and let it cook gently - undisturbed - for approx 20 minutes. Then stir it with a spoon to fluff it up, and serve immediately.
This dhal has good flavours from spinach, fennel seed, and coconut oil. I based it on a recipe by Rafi Fernandez, but then completely re-worked it trying to use Krish Ashok's recommendations from his "Masala Lab" book for maximum flavour!
Serves 2, with chapati and sides. Takes 25 minutes, plus 30 minutes of soaking the chana beforehand.
1 small piece of ginger, peeled (approx 1 cm3)
1 tsp coriander seed
2 tsp cumin seed
1/2 to 1 tsp aleppo pepper
2 tsp turmeric
100g fresh spinach, washed
2 tsp red lentils
1 tsp cumin seed
Juice of 1/2 a lime
Rinse the chana dhal and soak for 30 mins. Then pressure-cook them with enough hot water to cover, plus a dab of baking soda, and a dab of oil, for 20 minutes. (If you don't have a pressure-cooker: 45 minutes boiling on medium heat is probably similar.) Do some other prep (see below) while soaking/pressure-cooking.
Meanwhile, finely slice the onions, and the garlic and ginger.
Heat up a deep pan and add the coriander seed, mustard seed, cumin seed. Wait until they only-just start popping (it's OK to shake the pan while they toast), and then add a tablespoon of veg oil, plus most of the sliced onions. Keep about 1/6 of the onion back for the tarka later. After the onions have taken to the oil and started frying, add the garlic, ginger, and chilli. Cook these, stirring, until the onion is nicely softened.
By this point the chana dhal should be done. De-pressurise the pressure cooker. In the pan with the onion, add the turmeric, stir, and add the chana dhal as well as some of the cooking water to this pan. Try to hold some cooking water back - you can later add more if you think it needs it.
Add a pinch of salt, a pinch of sugar, and some more hot water if it all seems too thick. (You are aiming for a thick but pourable texture, thick enough to scoop up with flatbread.) Bring to the boil and bubble for 5 minutes.
Chop the spinach roughly and put it all into the main pan. Stir, and let it bubble for 5 more minutes while you prepare the last bit (the tarka).
Heat up a frying pan over a medium-hot heat, and add the red lentils. Shake these around as they toast, watching until they turn pink and fragrant. If you don't like big crunches, you can now take these and put them in a pestle and mortar (or spice grinder) to grind them up. But you can keep them whole, that's traditional and adds texture.
To the same hot frying pan add the coconut oil, then the remaining finely-sliced onion pieces. Shuffle them around to get them going, then also add the fennel and cumin seeds. Stir fry these - the aim is to get the onion crispy-fried, and the seeds toasty without burning.
Stir the lime juice into the dhal, then put the dhal into your serving dishes. Now sprinkle the tarka (fried things) over the top, including the dregs of the coconut oil. Sprinkle some coriander leaf over, too.
A very simple loaf, good for a tea break - it's easy, only a handful of ingredients, and vegan too! I am told that it's a classic wartime recipe.
I only used one tbsp of sugar, to keep it on the un-sweet side, so you can have a slice of this buttered if you like. But if you'd like it more like a standard cake sweetness, you would simply add more sugar (e.g. double it).
This version of the recipe is adapted from Ganga/LifeTimeCooking whose nice post about it tempted me to do some baking today.
Mix the dried fruit (chop any large ones like apricots) with the sugar and the hot tea. Soak for at least an hour or as long as you like.
Mix the flour, cinnamon, salt in a bowl. Pour the fruit mixture and its tea liquid over these. Mix to a thick batter - I had to add some milk to get it to a thick batter stage.
Bake in a lined loaf tin for 30-40 mins at 180C until skewer comes out clean. Cool 20 mins in the loaf tin, then remove onto a cooling rack. Serve with or without butter (doesn't need it).
This lovely cake is a nice moist vegan cake, made with plenty of zest and juice from a bunch of mandarins. It went down well with our neighbours! You can use oranges instead, or any orangey fruit, I'm sure.
Serves 12, takes about 90 minutes.
Ingredients:
Start your oven pre-heating to 180 C.
In a pestle and mortar, grind the clove, and then add the chia seeds and grind them too. No need to grind them all fine, just as long as plenty of them have cracked. Add 4 tsp water and leave it to stand - the chia should turn it sticky.
Line a one-litre loaf tin with baking paper, and grease it.
Now prepare your mandarins. First of all, use a zester (or a sharp knife, or possibly a grater) to grate the zest off in fine pieces, and then put the zest into a small bowl. Then chop the mandarins in half (across their "equator") and squeeze the juices into a separate jug (mine gave me about 200ml juice). Make sure there are no seeds in the juice.
In a mixing bowl, mix together the sugar, cinnamon, nutmeg and two-thirds of the zest.
The other one-third of the zest will be used for the drizzle on top. We're also going to use one-third of the juice for that, so at this point you take one-third of the juice and add it to the zest that you held back.
By now, the chia will have had a few minutes to turn into a sticky wet blob. Now add this to the jug that still contains most of the mandarin juice. Also add the veg oil and the oat milk to that. Mix all these wet ingredients together, making sure that the chia breaks up and distributes well throughout.
Pour all these wet ingredients into the bowl which contains the sugar and spices, and mix them well. Then sift in the flour, baking powder and bicarb. Mix them well together, and immediately pour this into the buttered loaf pan.
Bake in a buttered loaf pan for 50 min at 180 C, until a knife stuck into the cake comes out clean.
Meanwhile, mix the icing sugar into the reserved zest+juice (remember, this was one-third of what you had). This glazing will be drizzled over the finished cake.
WHen it's ready, take the loaf out of the oven (still in its tin), and use a fork to prick some holes all over it. Chia-based cakes have a slightly "crispy" exterior so you may need to poke enthusiastically. Then drizzle the glaze over the whole loaf, making sure that the bits of zest are spread evenly over.
Allow the cake to cool in the tin for 10 or 20 minutes, then life it out gently, then out of the paper too and onto a wire rack to cool.
Here's my vegetarian haggis recipe. Inspired by this and this. I've only made this twice, so consider it a work in progress. But it came out well:
Serves 4--6 people. You can do most of it one day in advance, too.
Rinse the lentils and then boil them for 30-45 minutes. At the same time, boil the barley in a separate pan, until softened but with some bite. Drain both, and set them aside in separate bowls.
While they are boiling, prepare the rest. The onions and mushrooms should be finely chopped -- the size makes a difference to the texture of the haggis. Melt a good amount of butter/marge and fry the onion on a medium heat until well softened but not brown. Add the mushrooms and stir, frying for a couple more minutes before adding the spices. Give it one more stir.
Add the marmite and treacle to the stock and pour it into the pan. Add the lentils and the oats to the pan too. Bring it all to the boil, then turn the heat down and simmer gently (15 minutes?), until the mixture is thick and tender.
Grease a pudding basin. Stir the pearl barley and sunflower seeds into the mixture, then put it all into the basin. At this point, I let the whole thing cool and put it into the fridge overnight, for convenience.
Preheat an oven to 180C. Cover the pudding with foil and bake for 30 mins, then remove the foil and cook for another 15 mins. Leave for 5 mins, then turn out and serve, with mashed potatoes and swede (neeps).
The Spruce Eats website has a guide on what to do with witlof (aka Belgian endive) with some really tempting suggestions. They're not giving full recipes, just ideas. So when I saw this suggestion:
"Bake a witlof tarte tatin prepared with date syrup, aceto balsamico (balsamic vinegar), and thyme."
...I had to try and work it out! My recipe is inspired by this other witlof tarte tatin. I think it's a great idea to use date syrup instead of a sugary caramel, though. Plus this version is vegan, so bonus points for that!
Takes 40 minutes, serves 2.
Roll out your dough, or get it out of the freezer, and keep it in the fridge.
Pre-heat the oven to 190 C.
Trim the ends of the witlof and slice them in half lengthways, taking care that the halves stay intact as much as possible. Take a large frying pan and melt the butter with the oil over a medium-high heat, then place the witlof cut-side down in the pan. Cook for about 3 minutes until starting to caramelise, then turn over carefully and cook for another 3 minutes.
Meanwhile, prepare the caramel. Put the butter and date syrup together in a little microwaveable cup and microwave for 30 seconds so that they melt and become easy to work with. Stir into this the balsamic vinegar and the thyme.
Now assemble. Take an ovenproof dish, and grease it well with butter or oil (this is important, to be sure the tarte will come out of the dish in the end). Sprinkle the sugar evenly over the dish. Next pour about half of the caramel (or less) over the bottom of the dish, then arrange the witlof pieces nicely in the dish cut-side down. Try to squeeze the witlof in packed well. Now, place the sheet of dough on top and tuck the edges in a little around theother ingredients. Brush the top of the pastry all over with a little more olive oil.
Bake this in the oven for 30 minutes or so, until the pastry is nicely browned and crispy. Then take the pan out of the oven, and leave it for 5 to 10 minutes to cool before turning it out.
While you're waiting, make a salad to go with it. We had a nice kale salad with a mustard vinaigrette, which makes a really nice complement to the sweetness of the tart.
When you're ready to serve, place a plate over the top of the oven dish, and - using oven gloves since the dish is still hot - flip this assemblage upside down so that the tart comes out onto the plate. Divide it carefully, and serve.
(By the way, it's handy to serve this with serrated/steak knives in the cutlery, to cut through the pastry and the witlof neatly.)
Kapsalon is a famous kebab-shop meal in the Netherlands. We've had a really nice vegan version where the kebab meat is replaced by braised celeriac, so here's our home made version! Very nice for a Friday night dinner.
Takes 40 minutes, serves 2.
Peel the celeriac, and cut it into "doner kebab" slices about 2mm thick. The easiest way to do this is to cut it into big "steaks" of celeriac each about 2cm thick, and then slice those steaks into the strips.
Boil a kettle. Start the oven preheating for the chips.
Melt the vegan butter in a deep and large frying pan, and saute the celeriac strips for about 5 minutes over a hot heat, until they start to take on some brown colour.
Then sprinkle over the spice mix, add enough boiled water to only-just-cover the celeriac, and give it all a good stir to mix. Now turn the heat down, and let it cook gently for about 25 to 30 minutes, mostly undisturbed. You're braising the celeriac here, so you want a gentle boil and not too much disturbance, since you don't want to break up the pieces.
While that's cooking, put the chips in the oven to cook, according to the packet instructions (e.g. 20 to 25 minutes).
Now you've got plenty of time to prepare the toppings. Wash and finely slice the salad (tomato, lettuce, cucumber). Grate the cheese.
When the chips are done and the celeriac is cooked "al dente" and the water is mostly gone, you're ready to assemble. Put the chips into heatproof dishes (one per person), put the celeriac over the top, and sprinkle with cheese. Put this back in the oven for 3 or 4 minutes to melt. Take it out, spread the salad pieces over the top, then garnish with as much garlic sauce and chilli sauce as you wish! Eat messily, with a cold beer.
Orange roast celeriac - a good centrepiece for a roast dinner. Perhaps even a bit Christmassy with the caramelly orange flavours. (I was inspired by this veg space recipe which is similar but no orange.)
Serves 2, takes 65 minutes.
Heat the oven up to 200 C. While the oven is heating, prepare the glaze: zest the orange, and then squeeze the orange's juice into a pan. Add the zest, and put this on a hot hob and bring it up to the boil. Then add the soy, garlic and maple. Turn the heat down low, and let this slowly reduce while you prepare the celeriac.
Peel the celeriac and slice into thick "steaks" about 2cm thick. If you're using a big celeriac you might not need all of it. One per person is good. Now, use the knife to score shallow diamond "grill" patterns into both sides of the celeriac steaks - this will help them to absorb the flavours.
Put the celeriac steaks into a baking tray lined with baking paper and put them in the oven. They'll cook for 1 hour but you'll be basting them.
Turn off the heat to the glaze, and let it cool. You can shake the pan to help the flavours mix evenly, but don't lose the zesty bits. If you let the glaze cool for about 20 minutes into the celeriac's cooking time, then it'll be cool enough
Take the celeriac out of the oven, turn them over, and then carefully cover them with half of the glaze (the liquid and also the zesty bits). Put the celeriac back in the oven. After 20 more minutes, turn the celeriac over again and put the rest of the glaze on the second side, before returning them to the oven for their final 20 minutes.
Serve these hot. By the time they're done they should have some caramelly brown edges.
Dutch people love a croquette ("kroket") and so it was only a matter of time before I attempted making one!

The Dutch croquette is typically eaten on a bread roll with mustard or mayo, and is sizeable enough to be a light lunch. The outside should be crispy and the inside quite liquid and oozy, so that when you crunch it in your bread roll it becomes a mess of sauce and crunchy bits. Many croquettes aren't vegetarian of course, and the standard vegetarian version is usually something like potato-and-mixed-veg.
This version is inspired by a flavour combination we saw on TV - pea and dill - and it's lovely and light, fresh, and spring-y. Should I confess that we saw it on the Dutch version of Bake-off?
Chop the potatoes into medium-sized cubes and put them in a big pan of hot water. Bring it to the boil and boil the potatoes for 15 minutes. You can prepare everything else while the potatoes are boiling - there's no need to worry about the potatoes too much, they need to be just need to be properly softened to make a soft mash. When the potatoes are done you can just drain them and leave them until you're ready.
Meanwhile, make a white sauce. In a saucepan on a medium heat, melt the vegan butter and add the flour. Stir this all around with a whisk and cook it for about 5 minutes, keeping it moving, until the raw flour smell has gone (careful not to burn). It should be quite a thick goo in the pan. Add a bit of the plant milk and mix it with the whisk, then a bit more, then all the plant milk, and make sure everything is evenly mixed. Allow it to continue to cook gently for a little while, while you prepare the flavourings. This should be quite a thick white sauce - it needs to be fairly thick so that it will hold its shape later.
Now is a good time to finely chop the dill, chives, mint and leek, if you haven't already.

The potatoes should be done and drained. Return them to the big pan you cooked them in, and mash them with a potato masher. Then add the peas and mash a bit more, to crush them lightly and distribute them through.
Add the dill, chives, mint, leek, and salt and pepper to the white sauce, making sure it's all mixed quite evenly. Then pour the white sauce all into the mashed potato pot, and mix to make sure everything is evenly distributed.
Leave this to cool in the pan until it's cool enough to work by hand, probably 1 hour. At that point you can also taste to check the seasoning. I needed to add more dill and salt+pepper than I had originally expected.
Next, it's time to add the breadcrumb coating. Set up a "breading station": 3 bowls side-by-side, with (a) flour (b) egg/plant-milk (c) breadcrumbs. You now need to take portions of the main mixture, perhaps golf-ball sized, and form them into little cylinders. How you do that is up to you! We did it by hand, which is messy, for sure... Other people on the internet have used a piping bag. For the Dutch kroket it should be a few centimetres long, which is too long to be shaped using two spoons as seen in some other receipes.
Anyway, you make your little cylinders, then with each one you roll it in flour then egg/plantmilk then breadcrumbs, to get a good coating. You could repeat the egg and breadbrumb stages to get a thicker crust. You might be able to get away with just breadcrumbs, depending on how sticky your mixture is.
Put these breaded cylinders into the fridge for at least 1 hour to firm up.
Using a deep fryer, or a pan fille dno more than 1/3 with vegetable oil, heat up the oil until it's hot. 180 C is the official temperature to use, but I don't have a way to measure that. Instead, I pop a tiny bit of the breadcrumb into the oil: it should be hot enough that the breadcrumb fizzles and floats to the top rather than just sinking. Then, put a batch of krokets carefully into the oil, and cook them for about 4 minutes. Make sure they're well-covered in oil. Be careful not to splash oil, and watch out for exploding krokets (which can sometimes happen, I'm told!). When they're nicely brown and crispy-looking all over, take them out and drain on kitchen paper, while you do the next batch.
OK! Now when your kroket is ready, serve it on a soft bread roll! This kroket does not go well with mustard, but a bit of mayo would be alright if that's what you like. But the delicate light flavour of the pea and dill should hopefully come through nicely!

This Indonesian-style peanut sauce is much loved by the Dutch in their "adopted" (!) Indonesian taste. It goes really well as a basis for gado gado, and also with many other indonesian dishes. Having never been to Indonesia, I can only claim this is a good match to the sauce we get in the Netherlands!
NOTE: If you have "kecap manis", then use it! -- you can replace half the soy sauce with kecap manis, and reduce the sugar (leaving out perhaps a third of it). That gives a more authentic full flavour. It's not very common in Britain.
Ingredients:
100ml (approx!) tamarind juice --- OR 25 ml (approx) tamarind paste
1 clove garlic
If using tamarind "block", remember to prep it first (by soaking the right amount in warm water for a few minutes at least).
In a small blender whizz up everything except for the garlic and the water. You can add a bit of the water, to make it easier to get it out again.
Crush the garlic and fry it in a little veg oil, in a milk pan or similar, just until softened (don't let it burn), Then add the blended mixture and cook it for ten minutes or more, stirring. Add water as it cooks, enough to get the consistency right.
My mum's pear frangipane tart is a classic. Rich almondy frangipane, and soft pears, go together really well. Here, I've made a vegan version, partly by adapting Domestic Gothess's frangipane recipe. (Follow that link for lots of photos and tips on the process.)

The rich taste of frangipane is traditionally made with butter and egg. In this version, the egg is replaced by cornflour, flour and aquafaba. Aquafaba is the liquid from a tin of chickpeas (!) and can be whipped up in various ways. Here you do NOT need to whip the aquafaba, it (and the cornflour) simply help to bind the mixture around all that ground almond, plus a bit of baking powder for rise. Instead of butter, it's good to use a vegan "block" butter instead of margarine, to ensure this vegan version has a good rich impression. I used Violife, DG uses Naturli. Non-vegans can use old-fashioned butter.
You get great results using tinned pears in syrup for this tart. Apparently you can also use fresh pears, but that didn't work so well when I tried it (perhaps I should have poached them slightly first?). Anyway, a tin of pears in syrup is great for this.
Makes a single tart good for 8-10 portions.
FOR THE PASTRY:
FOR THE FILLING:
To make the pastry: mix the flour, almonds, sugar and salt together. Add the butter, cold and diced, and rub it into the dry ingredients with your fingertips until it resembles fine breadcrumbs. Then add the vodka/water, bit by bit, mixing with your fingers or a utensil until the pastry comes together in a ball. (You can also do all this in a food processor.)
Shape the pastry into a disc, wrap in clingfilm, and place in the fridge for at least half an hour.
Preheat the oven to 180 degrees C. Grease a springform tart tin, about 9 inches / 20 cm diameter.
Take the pastry from the fridge and roll it out to a disc large enough to fill the tin and go up the sides. (If you have to roll it back into a ball and roll it out again, that's fine.) Carefully lift it into the tin. Trim off excess pastry from the top. We probably only need it to be about 1cm deep, but deeper is fine.
Prick the pastry all over the base with a fork, then blind bake it, as follows. Place a sheet of baking paper or tinfoil in that will cover the whole base. Put baking beans (or rice, lentils...) in to fill the floor of the pastry, making sure they go right to the edge. Bake this in the oven for 25 minutes, then take out the baking beans and the baking paper/foil, and return to the oven for another 5 minutes of cooking.
During that last bit of cooking, make the frangipane. Whisk together the melted vegan butter and the sugar, then the flour and cornflour, followed by the aquafaba. Finally, mix in the ground almonds, baking powder, and vanilla/almond extract. I also added some of the juice (30ml?) from the pear tin, to make the frangipane liquid enough to pour a bit more easily, and of course for a bit of flavour.
Now assemble the tart. Take the pastry base out of the oven, and arrange the pear-halves nicely in it, cut side down. I used all five pear-halves in my tin. Pour the frangipane into the gaps where the pears are not, making a nice even layer in the pastry case. Spread it out evenly.
Return to the oven and cook for 30 minutes
Leave to cool in the tins for 20 minutes before turning out. Serve with cream, plain yogurt, or something like that; the tart is delicious warm or cold. Store any leftovers in an airtight container for up to 3 days.
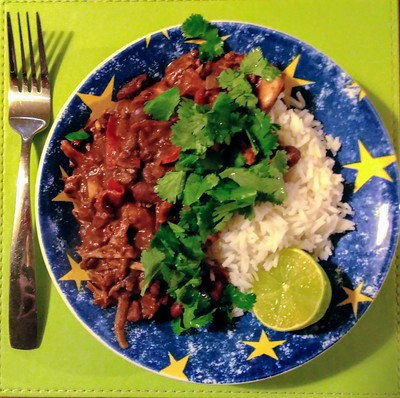
A Caribbean-inspired easy mid-week dish. The chickpeas go nice and roasty and sticky, flavoured with rum and soy. I served it with rice and peas, an imitation of the classic Caribbean dish, of which you can certainly find more authentic recipes out there. (My rice and peas was in fact a quick imitation of the recipe from Levi Roots.)
You should probably add some chilli sauce somewhere.
Serves 2, takes about 45 minutes plus an optional gap of half an hour while things infuse.
PREPARATION:
Rinse the chickpeas and leave them to drain well.
Put the coconut milk in the pan that you will use for the rice (one that has a tight-fitting lid), and put it on a gentle heat to warm up a bit. Add the onion, cloves and peppercorns - I added all these using an "empty teabag" so I could get them out again. Turn the heat off (it will infuse, for 30 mins or so).
Once you've prepared the coconut milk, put the rice in a sieve and rinse it, then leave it to soak in a big bowl of fresh water for about 20 minutes.
Also put the chickpeas into a mixing bowl, then sprinkle over the sugar, rum, and soy, and mix well. This doesn't have to marinade for long, but it can do.
...At this point it's OK to go away for half an hour or more...
COOKING:
Heat up an oven to 200 C.
Oil a roasting tin. Slice the peppers into long bite-size strips, mix them with the chickpeas, and then spread all of that out in the roasting tin. Put in the oven, to cook for approx 35 minutes, giving a good stir half way through.
Meanwhile, cook the rice and peas. Drain the rice (in a colander or sieve). Warm up the coconut milk again until only just bubbling, then add the thyme, beans, and rice. Give it a stir and then put the lid on. Leave it to cook gently, on the lowest heat you can, for about 20 minutes. Do not stir. When that's done, at the end you can fluff it all up with a fork, put the lid back on, and leave it off the heat while you get the rest ready.
Serve the rice and peas with the chickpea mixture over the top. Garnish with the zest of 1/2 a lime, and serve with perhaps a little salad on the side (e.g. cucumber).
These pancakes are lovely - they're quite filling, and very easy to cook. The flavour and texture are excellent: the sourdough starter gives some depth of flavour that might otherwise come from eggs, and the almond helps to balance it. They are not thin crepe-style pancakes, more like American or Dutch style.
You can prepare the batter the night before (and leave it in the fridge), or you can just let it stand for at least 30 minutes. The original recipe suggested that you can leave the batter out overnight to "develop the flavour", but we do NOT recommend that - our sourdough starter is quite active, and so if you leave the batter at room temperature for that long it over-proves and tastes very sour. Instead, pop it in the fridge overnight - that's perfect! Or just make it 30--60 minutes before you need it.
This recipe is based on the pancake recipe from healthienut. It's a good thing to do with sourdough discard, but you can also use fresh starter.
The recipe also uses ground flax or chia seed. You can probably buy it as pre-ground "meal", but I don't have that. Instead, I grind up some chia seeds in a pestle and mortar, and the salt goes in with it (because salt crystals can help to grind things up).
Makes 6 small or 3 large pancakes, good for a hearty brunch for two.
In a large mixing bowl, whisk together the sourdough starter, milk, and flours until smooth. Cover with a towel and let sit at room temperature for 30 min-1 hour, or cover with clingfilm (or similar) and leave in the fridge overnight.
When you're ready (maybe 15 minutes before time to eat), combine the flax/chia seed meal and water in a small bowl. Let sit for 5 min. (You might also pre-heat the pan now, see below.) Then add flax egg to the bowl with the starter along with the rest of the ingredients (sugar, baking powder, salt). Stir until a smooth and slightly thick batter forms.
Heat a large skillet or frying-pan over medium heat. Add a dollop of oil /marge to prevent sticking - not too much. Pour a ladleful of batter on to the skillet (about 50ml?). Spread to a circle with the back of the spoon if needed. Cook until the edges start to become matte (about 1.5 minutes). Flip and cook for an additional minute or until golden brown on each side.
Top with preferred toppings, such as berry compote, fresh fruit, and/or maple syrup. Top tip: blueberries and coconut cream!
Foodgeek has some of the best sourdough bread recipes I've found. It's his precise measurements and careful explanations that really enabled us to actually bake good sourdough. You should watch some of his videos.
One of his recipes is for sourdough English muffins. These are great for breakfast, and they're also really handy when you don't have access to an oven, because they're cooked in a pan.
Here I've veganised his recipe. I'm simply switching cow milk for oat milk, but I find you need to reduce the amount of milk (else they become really sticky to work with). I'm also including some tips which for me made it easier to handle everything.
Make the dough: Add the flour, sugar and salt to a bowl. Mix it well with your hands. Then add the milk and the sourdough starter. Mix it until it comes together. Once it gets too stiff dump it out on the kitchen counter and knead it until all the flour has been absorbed into the dough. Then cover the dough and leave to ferment for 8 hours. If it’s very warm you may want to shorten that time.
Next, when the fermentation is done, shape the muffins. I do it differently from him, partly because I don't have a cookie cutter, but also I found it really handy to use a little square of baking paper for each individual muffin. Here's a picture showing how I do it:

Use a roasting tin, or anything that you can keep the un-cooked muffins in - it should have high sides, so that when you drape a towel over the top it won't touch the muffins. Cut/rip 10 little squares of baking paper, about 4 inches (10 cm) square. Put them in the roasting tin(s), and dust them with semolina.
For the next step, it will help to have a dish of water available, and occasionally dip the palms of your hands in this bowl - this stops the sticky dough from sticking to you.
Dump the dough out onto the counter or a big chopping board, flatten it a bit, and use 1 or 2 dough scrapers to chop it into 10 equal-sized pieces. (If you don't have scrapers you can do it by hand.) Now, for each piece, with slightly wet hands you can roll and shape it into a flat burger shape, then place it on a piece of baking paper.
Sprinkle the dough with more corn flour. Cover the whole lot loosely with a dish towel and let the muffins rise for an hour.
Cook the muffins:
Put a pan on to medium high heat and let it come up to temperature. Put as many muffins as you can so that they don’t touch each other. You do NOT need to remove the baking paper! You can place them in the pan with the baking paper face up. This makes the whole job easier.
Put a lid over the top of the pan so that the muffins can steam themselves. Cook for about 7-10 minutes until the muffins are golden brown. Then take off the lid, peel off the baking papers, and flip the muffins over and cook them 7-10 minutes on the other side.
Put the muffins on a wire rack and let them cool.

For a whole lot more detail and a nice video, see Foodgeek's sourdough English muffins recipe.
A storecupboard dhal with hints of southern India, inspired loosely by more authentic sources such as this one.
Serves 2, takes about 70 minutes but with a big gap in the middle where you can get on with other things.
For the tarka:
Take a large frying pan, warmed to medium hot, and toast (dry-fry) the mung dhal in it for about 5 minutes until they smell toasty and turn slightly pink/orange in colour. Keep shuffling them so they don't burn. Then pour them into a sieve (make sure you don't melt it if it's plastic), and rinse and soak them in cold water briefly.
Take a deeper pan with a lid, and warm it up medium hot, with the cinnamon stick in the dry pan. When that's had a minute or so, add the mung beans as well as about 400 ml of water. It needs plenty of water. Also add the turmeric, chilli seeds, asafoetida and salt. Bring this to the boil and then simmer it for about 45 minutes, part-covered with the lid. Make sure it doesn't boil over, but that aside you don't need to worry about it too much.
After 45 minutes the mung dhal should be soft and swollen and the chalky texture should be just about gone. Turn off the heat, and stir in the methi and 1 handful of the dessicated coconut. You can leave this to sit for a while, to absorb -- you can just do the rest whenever you're ready to eat.
When you're almost ready to eat:
If you have a hand blender, use that to blend about a quarter of the mixture in the pan. This gives some thickness without mushing everything. You can also use a potato masher or suchlike. Then, put the dhal back on a very low heat -- do not allow it to boil.
Make the tarka: in a frying pan (perhaps the one you started with!), get the oil nice and hot. Finely slice the onion and the chilli, and put them in to fry until caramelised and a bit crispy. Also add the other tarka ingredients after a couple of minutes.
Serve the dhal in bowls, with the fried tarka sprinkled over the top. Eat with bread (e.g. roti/chapati) or as part of a larger meal.
We had gorgeous jackfruit fritters in a London pub. Somehow, they got them extremely chickeny tasting. Impressive! I had to try and replicate the effect.
So what we're doing here is lovely juicy jackfruit fritters, making sure there's not too much stodgy dough getting in the way. It's flavoured with herbs, but specifically with those flavours that remind you of chicken and stuffing: sage, thyme, onion. I'm using a mixture of fresh and dried herbs according to availability - you could change it around. You really need at least some of the herbs to be fresh, because they're not just there for flavouring, they provide leafy green body to the fritters too.

I use chickpea flour (gram flour) to hold the fritter together and to help give it a moist chew. You could try other types of flour but I don't think they'll give the same effect.
You need to get the ingredients as dry as possible - the less excess water, the better the fritter will hold together. So, try washing and draining your jackfruit and herbs early, and leaving them to drain for a good while. I also pat the jackfruit dry with kitchen paper.
Serves 1-2, takes 30 minutes.
Drain the fackfruit pieces as well as you can, cut off any very hard bits and discard, and then chop the rest roughly - it should end up as pieces a bit like chicken kebab meat, smaller than bitesize but still chunky. You can squish the pieces a little with your fingers, so that they break up a little and expose more surface area, and also look less like triangles.
Put the fresh herbs in a blender and pulse to chop them finely. (Or use a big knife and chopping board!) If you're using the blender, you do not need to discard the stalks for the parsley, but you will do for the others that have harder stalks.
Mix everything except the flour together well in a medium bowl, ensuring the herbs and other flavours are well-distributed over the jackfruit pieces. Leave to marinate for at least 1 hour.
When there's about 15 minutes before time to eat, sprinkle the chickpea flour evenly over the mixture, and mix it all through well. You're aiming to give the mixture enough flour that it's going to hold together well, but you do not want the flour to take over from the jackfruit. You're not making a dumpling! The flour should absorb pretty quickly into the mixture
On a flat surface, divide the mixture into two balls, then squish and compress them with your hands to make two compressed, burger-y shapes. Let this sit for a few minutes to absorb and to start to hold its shape, while you prepare other things.
In a large flat frying pan, warm up some veg oil ready for frying. You'll be shallow frying, but don't be stingy with the oil - you need enough oil (maybe about 1mm depth?) such that the surface of the fritters will form well. Very very gently, and without breaking or reshaping them, manoeuvre the fritters into the pan. Don't disturb the frying fritters too much, especially at first - let them get a surface from frying. They'll take about 5 minutes one side, and then you delicately turn them and give them 5 minutes the other side.
Serve as a starter, or as a midweek meal with chips and salad.
This flavour combination was fabulous - the hot deep flavour of muhammara (from Turkey/Syria, so I'm told) and the herby zesty za'atar (ours is from Palestine) make a great complement to the classic taste of grilled aubergine. We're not from the Levant so don't take this as authentic, but this is evocative and quite easy.
Muhammara is a fiery dip, and mixing it with mascarpone (or similar) in a ratio os 1:2 gets the heat just right for this, in our opinion, though you may wish to tweak it! Serves 2 hungry eaters, takes about 30 minutes (aside from making the pizza dough, which is optional to do it yourself).

Heat your oven to 200 C.
Put the pizza base out onto a lightly-floured baking tray. Mix the muhammara and mascarpone together, and spread this evenly over the pizza base, leaving the edges clear like you normally do with pizza.
Slice the aubergine in half down the middle, then slice thinly to make semicircle slices (about 3mm thick). In a bowl, toss the aubergine slices with 1 tbsp of the olive oil. Then lay them out nicely on the pizza, to make a scallop pattern - don't just pile them on, you want each aubergine piece exposed equally to the heat. You'll cover almost the whole pizza.
Sprinkle the za'atar evenly over the aubergine pieces, then drizzle the remaining olive oil evenly over the top. Put it in the oven for about 20 minutes, until it's looking lovely.
Chop the tomatoes into little quarters. Take the pizza out of the oven, and dot the tomato pieces all over, then also sprinkle the parsley over. Leave the pizza for a minute before eating! It's too hot, and also it's good for the tomatoes to take up some of the heat.
This was a great dish making a centrepiece of the cauliflower with Indian spicing. I made it up based on something that looked nice on Masterchef. A notable non-cauliflower-lover gave it top marks so I'm sure you'll love it too.
Serves 2, takes about 50 minutes, plus extra time at the start to marinate.
For the rice:
For the cauliflower:
For the carrot:
First, marinate the cauliflower. You can do this way in advance, e.g. 2 hours - but give it at least half an hour if you can. Mix the coconut oil, vegetable oil and all the dry spices. Chop the cauliflower into four big quarters - remember, you want these to come out whole at the end of the process, try to cut them so they'll stay entire. Now marinate the cauliflower in the oil and spice mix, turning it a few times to try and get all the surfaces flavoured.
When there's about 40 minutes until service, turn on the oven to 180 C. Oil a baking tray or baking tin and pop it in the oven to pre-heat.
Now start off your rice. Wash it in a sieve or suchlike, washing it until the water runs clear, then leave it to soak in fresh cold water for 10--20 minutes. Make sure all the bits you need for the rice are ready.
Take the baking tray out of the oven - be careful of the hot oil - and lay the cauliflower pieces flat-side down into the hot oil. Return to the oven. They'll cook for about 30 minutes, and halfway through you'll want to turn them so that "the other" flat side is down in the oil.
Drain your rice and put it in a pan that has a tight-fitting lid (it's handy to oil the pan a little, in advance). Add all the other ingredients to the rice pot, as well as 2/3 mugful of cold water (or less, if you're using coconut milk - 1/3 mugful?). Bring this to the boil, stir, then turn the heat down to the lowest it can possibly go and put the lid on. You now need to leave this un-disturbed for 20 minutes for the rice to absorb. Meanwhile you can get on with the carrots.
Slice the carrots into very thin coins and put them in a pan with a little oil and 100ml water. Bring to the boil, salt, and cook vigorously for about 12-15 minutes until soft.
Drain the carrots. If you've still got the bowl in which you marinaded the cauliflower, you can pop the carrots in there to pick up any leftover spice. If not, don't worry. Put the carrots and coriander, together with a dash of water (e.g. from cooking the carrots) and a dash of oil, all into a blender and blend to a smooth puree. Check seasoning, add a bit more salt if needed.
To serve: with a big spoon, scoop the rice out to make a mound. Take the puree and spread it over the plate next to the rice. Take the cauliflower pieces from the oven and place them on top of the puree.
I veganised a recipe handed down from my mum, and it's great. It's very soft and moist with a dark sweetness (from the dark sugar) that goes really well with the other flavours. Plus it keeps for a good while, and easy to make from mostly store-cupboard ingredients.
I've been making it for years - here's the original recipe - but now I wanted to VEGANISE it. It worked!
The most exotic thing involved is the ingredient that I used to replace egg: chia seed. You can also try flax seed. This other website has a nice guide on how to make "chia egg" or "flax egg" - there is something in these seeds that makes a glutinous substance that can bind a cake together.
It's a very easy recipe. The cake mix looks quite strange when you put it in the oven - a big blob of grated carrot, mostly! But it becomes a big brown dark and moist cake.

The end result is great. Compared against the non-vegan version there's a different texture - the edge of the cake is chewy/crispy in a nice way, I find.
Make sure the walnuts and dates are quite finely chopped. It's nice to have big bits but they can tend to make the cake fall apart, which is more of a risk with this vegan version.
Line an 18cm (7 inch) round cake tin with greased greaseproof paper, and preheat the oven to 180ºC (350ºF, gas mark 4).
If your chia seeds are whole, grind them up in a pestle and mortar. If they're already ground, that's fine, and you might like to include a small sprinkle of whole seeds as well to add a bit of variety to the texture. Add water to the chia seeds, about the same volume of water as chia. No need to wait to let it "set" or anything like that.
Put the sugar into a mixing bowl and gradually whisk in the oil, then whisk in the chia mixture too. Add the flour, cinnamon and baking powder/bicarb and stir the mixture well, beating out lumps to make the mixture as smooth as you can. Add the carrots, nuts, dates and cider vinegar, and mix.
Pour the mixture into the prepared tin and bake for about 1 hour 10 minutes, until the cake is risen and firm to the touch.
Remove from the oven, leave to stand in the tin for 3 minutes, then turn out onto a wire tray, peel off the paper and leave to cool.
This evening, took the time to make a nice mushroom and aubergine biryani. It takes a little time to prepare the onions and the marinade, but this method cooks the rice beautifully and makes a great one-pot dish.
Serves 2. The recipe here is based on a biryani recipe in "Indian vegetarian cookery" by Rafi Fernandez (p109). - And if you're wondering if 2 onions is too much for 2 people, well I wondered too, so I checked it against three other recipes before I tried it. It is indeed the right amount!
For the marinade:
Plus:
Fry the aubergine pieces in not-too-much oil, just a touch - just to get a bit of colour on them.
With a fork, beat the yoghurt with the other marinade ingredients in a decent-sized bowl. Toss the mushroom and aubergine in this paste, making sure they're covered well, and leave to marinate for at least 20 minutes - could be much longer if you like.
Slice the onions into 5mm halfmoons, and fry them in hot oil for up to 10 minutes to crispy. Drain them on kitchen paper.
Rinse the rice. Parboil the rice (5 mins) with bay leaf, cinnamon, cumin seed and saffron. Then drain it and run the cold tap over it a little to stop it cooking. Don't do too much, no need to wash the flavour away.
In a pan with a tight-fitting lid, put a glug of oil and/or butter. Spread it around to make sure the bottom of the pan is coated. Now place a small scattering of rice, then the mushrooms+aubergine in a layer. Then half of the remaining rice, followed by most of the fried onions as a new layer (keep some fried onion for garnish), and finally the rest of the rice. Pour the milk over the top, gently making sure you get it evenly all over.
Now put the pan on the heat. Turn the heat down to the lowest it can go, and put the lid on. Let it cook gently for about 40 minutes - do not stir it ever, and do not open the lid.
To serve - turn the contents of the pan out onto a plate. Garnish with the leftover fried-onion, and coriander leaves.
Two flat mushroomy tarts, really easy to make and vegan too. This recipe makes "half of one half of the other" but you can concentrate on just one or the other if you like.
The creamy one is a bit more savoury, while the tomato/pepper one is sweeter. They complement each other nicely.
Serves 2, takes 40 minutes (but the second half is just waiting, so you can do other things).
Preheat the oven to 200C, 180C fan.
Divide the pastry into two rectangular pieces, place it on a baking tray, and put something on top to weight it down a bit while it "blind bakes" in the oven. We just used some tin baking dishes (doesn't need to be too heavy). Put this in the oven and blind bake for 15 minutes. Meanwhile, prepare the toppings.
Warm up some olive oil in a large frying pan. Slice the mushrooms thickly and add them to the pan. Fry for a few minutes. Slice the red onion and add it. Fry it for another few minutes, stirring, until the onion is nicely softened.
Divide the contents of the pan in two, i.e. move half of it into a separate pan. Add the pepper to one pan, and the garlic and thyme to the other. Continue to fry a little more, but not too much. (It'd be nice to get a bit of colour on the pepper if you can.) Chop the sundried tomatoes, and add them to the pan that has the peppers.
When you take the pastry out of the oven, discard the weights on top.
On one pastry, spread the Oatly creme fraiche, and then spread on top the contents of the garlicky pan.
On the other pastry, spread the contents of the other pan. Also, take the jar of sundried tomatoes, and carefully sprinkle some of the liquid (i.e. tomato-infused oil) over the top.
Season with pepper if you like.
Bake these pastries in the oven for about 15-20 minutes.
OK, "vegan chorizo carbonara" - I think neither the Italians nor the Mexicans will forgive me for this one! But it's a veganuary experiment and I like it.
Thanks to veganuary I'm learning about chia egg, and here it really does work to provide the gloopy egg-like saucing. The chia also gives a little bit of flavour and crunch.
To get the flavour balanced, you add more lemon than you would to a "normal" carbonara - it isn't authentic but it adds some freshness and lightness.
Serves one, takes 15 minutes.
First, prepare the chia egg: grind up the chia seed in a pestle and mortar (or similar), not for too long - it doesn't need to be very fine - then add 3 tbsp of cold water. You can leave this to stand and thicken up as you do the other stuff.
Start the spaghetti cooking: put it in a large pan of boiling salted water. Cook it for maybe 12 mins until it is al dente.
Divide the chorizo into small bites. In a small frying pan, fry the chorizo in olive oil, hot at first but then turn it down to medium.
Chop the parsley roughly.
Mix the lemon juice and rind into the chia egg. You may need to stir the chia egg and poke it to beat out any clumps.
When the pasta has reached the "al dente" stage, drain it in a colander and then return it to the pan you cooked it in. (No need for any more heat at this point.) Add the chia egg and lemon, as well as the oat cream, and mix it through thoroughly. Then add the chorizo and the parsley, and mix them all up.
Serve this up, with nutritional yeast sprinkled on top.
I've been using "black bean chorizo" in my cooking for years. It's based on Hugh Fearnley-Whittingstall's "tupperware chorizo" recipe - it makes a densely-flavoured black bean paste, not as firm as real chorizo but with the same kind of flavour depth.
It keeps in the fridge for a long time (let's say... a month?) and is really handy for a bit of complex strong flavour which, in vegetarian cooking, can otherwise be hard to get!
Put the black beans in a bowl and lightly mush/crush them, e.g. with a fork or a masher. They don't need to be fully minced but, at least... not bean-shaped any more!
Add all the other ingredients. Mix it all up thoroughly. It may well seem "too wet" with the red wine but don't worry, it all absorbs and matures.
Put the mix in a tupperware box that you can shut airtight. Shut it, put it in the fridge, and leave it for at least a day before using, ideally 1 to 3 weeks.
My amazing chilli sin carne (inspired by this version) is easy to make.
The only tricky thing is "pulling" the jackfruit at the end of the cooking - it's a bit labourious but it makes a massive difference to the way the food tastes in the mouth afterwards. Please don't skip it! You could ask your guests to pull their own platefuls if that works.
Serves 3-4. (It keeps fine in the fridge and tastes good next day...)
Preheat a medium grill. Coat the jackfruit pieces in the three dried spices. Put them on kitchen foil on a baking tray, and put them under the grill for about 15 minutes, turning halfway through. This helps dry the jackfruit out.
Meanwhile, in a large deep pan, start the base of the stew: fry the diced onion (gently, don't let it burn at all) for about 5 minutes, then add the garlic and the chili. Stir. Let them fry for a minute or so before adding the mushrooms on top and stirring again. Optionally you can let this cook a bit more to get a touch of colour on the mushrooms, but either way, add the carrots, stir, and then add the chopped tomatoes, the red wine, and a splash of hot water (enough to loosen it to an ordinary stew thickness). Add the jackfruit to this when it's done grilling.
This is going to bubble for a good half hour, on a medium-low heat, with the lid on (take the lid off near the end if it needs to thicken up). You can start the rice cooking perhaps, if that's what'll be accompanying it.
Meanwhile, optionally you can griddle the red pepper to get some colour on it. Or just add it to the stew directly. Also add the kidney beans about half way through the stewing time.
When there's about 5 minutes left, take the lid off the stew, and add the chocolate broken into pieces. Let it melt and then stir it through. It should make the stew thicken up and become more of a dark brown colour.
The main final thing you need to do is "pull" the jackfruit. With a pair of forks - ideally strong ones! - grab each piece of jackfruit one by one with a fork, and with the second fork rake at it to make it come apart into stringy pieces. (Don't do this in a non-stick pan, you'll ruin it with the forks.)
Chop the coriander roughly and mix it in to the stew (or sprinkle it over) just before you serve it.
Serve with rice, crusty bread, slices of lime, vegan soured cream... as you like.
Aubergine makes a great simple vegetarian/vegan alternative to battered fish and chips. Cook it like this.
Serves 2. Takes 25 to 30 minutes.
And to serve:
Preheat the oven for the oven chips. (The aubergine will be going in too, later.)
Mix the flours and salt in a medium-sized bowl, and then start to pour the beer in, stirring with a fork to get everything combined and beat the lumps out. Try to use as little beer as possible to get the batter smooth - you want it to stay nice and thick so it'll form a thick coating.
Cut your aubergine(s) into big fillets. It'll depend on the size and shape of your aubergines, but for the medium-sized fattish ones I buy you can cut one in half lengthways and that gives two nice pieces, one for each person. But! You need nice big fillet-like pieces with both sides having flat white flesh exposed - so that the batter sticks better, and so that it's easier to fry. So if one side of a fillet is umblemished purple round skin, cut a thin slice off. You can discard that slice or you can keep it to batter+fry as scraps later.
Put the oven chips in the oven.
Heat a frying pan with a decent amount of oil for shallow-frying. Be a bit generous.
Dip the aubergine pieces in the batter, turning them around to coat them properly. Then immediately pop them into the hot oil.
Let them fry about 5 minutes on one side - don't move them around much, just let them fry to get a good coating. Just before you turn them over for the other side, take the leftover batter and pour a little bit on top of the aubergine, to replenish the raw batter on the uncooked side. Then you can turn the aubergine fillet over and fry the other side for 5 minutes.
When the aubergine fillets have fried to a nice golden crust on each side, take them out of the pan and put them on a baking tray, and pop them in the oven alongside the chips, to cook for another ten minutes. This will get the inside of the fillets nice and cooked and yielding.
During the last ten minutes, you can warm up the mushy peas or sort out whatever you want as accompaniment. You can also batter and fry those leftover pieces of aubergine. Or just fry some of the batter to make scraps.
Warning - the aubergine fillets retain heat really really well. Beware of burning your mouth when you tuck in to them!
Tamarind is ace. It imparts a deep, rich and sweet flavour to curries. Buy a block and put it in your fridge, it keeps for months, and you can hack a piece off and chuck it in your curry just like that. That's what I did in this lovely chana (chickpea) curry.
Note that the block sort-of dissolves as it cooks, and leaves behind inedible pips. If you prefer not to spit out pips then you could put the tamarind in a paper teabag perhaps, so you can fish it out afterwards.
You can change the veg choices in here - the red pepper is a nice bright contrasting flavour - but in particular the baby aubergines do this great thing of going gooey and helping to create the sauce. Full-sized aubergines don't seem to do that, in my experience. It's the tamarind and the aubergine that go to add body to the sauce, I think - I don't add any tomato or anything like that, and yet the sauce is flavoursome and thickened.
Heat the oil in a largeish deep pan which has a lid, on quite a hot frying heat. Add the spice seeds and the cloves - you might like to put the lid half-on at this point because as the seeds fry and pop they'll jump around and may jump out at you.
After 30 secs or so with the seeds, add the onion, then the chilli and the powdered spices. Give it a good stir round. Let the onion fry for a minute or two before adding the red pepper and the aubergines. Fry this all for another couple of minutes, stirring occasionally.
Add the chickpeas, the beetroot with its juices, the tamarind block, and maybe 1 cup of boiling water (don't add too much water - not enough to cover the mixture). Give this a good stir, then put the lid on, turn the heat down to its lowest, and let it bubble for 30 minutes or so. It can be longer or shorter, I'd say 20 minutes is an absolute minimum. No need to stir now, you can go and do something else, as long as you're sure it's not going to bubble over!
When the curry is nearly ready, take the lid off, turn the heat up to thicken the liquid if needed, and give it all a stir.
Give it a good twist of black pepper, then serve it up in bowls, with coriander leaf sprinkled on top. Serve it with bread (eg naan or roti).
A nice fresh pea soup can be great sometimes, and also a good thing to do with leftovers. This worked well for me when I had some leftover spring onions, creme fraiche and wasabi. You can of course leave out the wasabi, or swap the creme fraiche for cream or a dab of milk, or you could add watercress perhaps.
Boil a kettle.
In a smallish pan melt the butter. Chop the spring onions, and fry the white bits gently to soften them, about 4 minutes. Then add the green bits of the spring onions, as well as the peas and the tiny dab of wasabi.
Turn up the heat and also add the boiling water, just enough to cover things. Once you've brought the pan to the boil you can turn it right down low, put a lid on it, and let it bubble gently for approx 10 minutes, no need for more.
Take the pan off the heat, and with a hand blender you can whizz up the pan's contents to blend it to a smooth soup. Add the black pepper and creme fraiche and stir it through.
This was gorgeous. I hadn't realised that the sweet butternut and the salty halloumi would play so well off each other.
Serves 2, takes 45 minutes overall but with a big gap in the middle.
First get the oven pre-heated to 180 C. While it's warming get the butternut ready to go in the oven. Chop it into bitesize pieces, roughly the size of 2cm cubes but no need to be exact. Then put the pieces in a roasting tin. Take the tines of rosemary off the stalk, chop them up and sprinkle them over the squash, then drizzle generously with olive oil. Chop the garlic into two pieces (no need to skin them - we're not eating them, just using them to add flavour) and place the pieces strategically among the squash. Then put this all into the oven, to roast for maybe 40 minutes.
When there's about 10 minutes left, heat up a griddle pan and a frying pan on the hob. Don't add any oil to either of the pans.
Take the asparagus stalks, toss them in olive oil and lay them on the griddle. Don't move them about.
Put the pine nuts into the hot dry frying pan. You'll want to shuffle these about for the next few minutes, watching them carefully - they need to get a bit toasty but not burn. While you're doing that you can cut the halloumi into bitesize pieces, about 2cm cube size. Turn the asparagus over to cook the other side and add the halloumi to the pan too. (I hope they fit in the pan with the asparagus...) After a couple of minutes you can turn the halloumi over.
Get the tin out of the oven a couple of minutes before you serve it. Find and discard the garlic.
To serve, place the asparagus on each plate, then next to it you put the squash and the halloumi. Sprinkle the pine nuts over the squash and halloumi. Finally sprinkle a squeeze of lemon over.
It's asparagus season, plus I have a half-used packet of ready-cooked chestnuts. Wait a moment - maybe those flavours can come together over a risotto. Yes they can.
Note: I would have started with some leek or onion to help get things going - if I'd had some.
Quantities are to serve 1, but scale it as you like. Took about 30 mins.
Rinse the asparagus, snip off the hardest end bits and chop the rest into bite-size pieces (about half an inch).
In a good-sized saucepan heat up 1 knob of butter. When it's melted add the rice and the asparagus and give it a good stir. Let it cook for a minute or so before you add a small cup-worth of stock and/or wine. Stir the rice gently as it absorbs the liquid. Eventually when pretty much all is absorbed add more liquid, and continue stirring. Continue this way for about 20 minutes, until all the liquid is added and the rice is approaching being nicely soft.
In a small frying pan heat up a big knob of butter. When it's melted and ready to sizzle add the halved chestnuts. Stir-fry them around for 3-5 minutes until coloured and smelling nice, then add the chestnuts and the butter to the risotto, stirring them in. Chop the parsley finely and add that too, stirring.
You'll want the chestnuts to spend about 5 minutes in the risotto to meld the flavours together. Then add a good twist of pepper, stir, and serve with plenty of shaved parmesan on top.
This is a good hearty Sunday lunch for a vegetarian. One thing I'm missing as I increase my vegetarian-ness is something that's a proper centrepiece for a Sunday roast - those "nut roast" things which are fairly common are OK but I don't think I've had one that could outshine the roast potatoes on a plate. Anyway toad to the rescue. Of course you can do toad-in-the-hole with veggy sausages, but this here is great and not pretending to be anything it isn't!
Serves 2. Takes about 90 minutes in total, including a lot of oven-time where you can do other things.
I recommend you serve this with onion and red wine gravy (takes about 30 mins in a gentle pan), and have some raspberry vinegar available to sprinkle on the pud.

With a whisk or a fork, mix the milk, water and egg. Whisk the flour in, beating out any lumps. Now let this batter stand for a little while, e.g. 15 minutes, though it can easily rest for an hour.
Preheat the oven to 210 C.
Peel the squash and cut it into big thick fingers, like oversized chunky chips. (This is easiest if you're using the top of the squash and not the lower half with the seeds.)
Brush a roasting tray with oil (olive or vegetable) and then spread the squash pieces out on it. Drizzle over some more oil then roast the squash in the oven for about 40 minutes. They're going to get a bit more cooking after this, so they don't need to be "done" - they need to be at the point where they're just starting to soften and to get some darkening caramelisation at the edges.
While the squash is roasting, prepare the roasting tin in which you'll cook the toad. This needs to be at least 1 inch deep. Put a good glug of vegetable oil in, and then put this in the oven alongside the other stuff, so the tin and the oil can pre-heat to a good hot heat.
Take the squash out of the oven. If you leave them out a couple of minutes, they'll cool a bit so they're easier to handle in the next step.
Next is assembling the toad. It has to be done quickly! So that everything's hot in the hot tin. Quickly get the hot tin from the oven, pour the batter into it, then place the squash pieces one-by-one into the middle of the batter with a bit of space between them - and immediately return this to the hot oven and shut the door. This then cooks for 20-25 minutes until the batter is risen and crusty, the squash is nicely cooked and getting a nice roast colour.
If you have more pieces of squash than you can accommodate in the tin, simply put them back on the roasting tray and continue to roast them. You can serve them alongside.
Inspired by Nigel Slater's recipe I made a great and simple vegetarian stew (vegan, in fact), using my black bean chorizo to help add depth of flavour. (If you haven't got any of that, you could probably do something similar just with a blob of black bean sauce, even though the flavour is different?)

Serves 1 (fairly big portion), takes 25 mins.
In a deep pan which has a lid, heat up about 1 tbsp vegetable oil, while you chop the onion. You want to chop about three-quarters of the onion into whatever size pieces, and the remaining one-quarter of the onion slice it into nice rings, about half a centimetre thick.
The misc pieces of onion, put them in the pan and give them a good fry to get them softened. Add the three spices and stir around. Then add the chorizo - not too much, it's mainly for flavour. Let this cook for two minutes or so.
Then add the lentils and stir, then add enough boiling water to only-just-cover. Put a lid on, turn the heat right down, and let this bubble for 15 minutes.
In the final five minutes, heat about 2 tbsp of vegetable oil in a frying pan. Make sure the onion rings are separated into circles, and put them in the pan to fry briskly for 5 minutes, turning halfway. While these are getting a little crispy, chop the mangetouts roughly into maybe 3 pieces each and chuck them into the stew, and also add the bits of parsley and the lemon juice.
When the onion rings are ready, simply put the stew in a bowl and sprinkle the onion rings on top.
I love a lamb tagine, so I'd like to make a vegetarian tagine that competes with it for the fullness of flavour. Here's my best one so far, making it deep and main-coursey by having large chunks of aubergine flavoured with cinnamon to take centre stage, and bitterness from fried lemon slices so that there's contrasting objects in there along with the standard tagine backing.
And yes you're meant to eat the lemon slices, rind and all. You don't have to eat the rind if you don't want, but it's doing the bitter/sour job we've got it for.
Serves 2, takes maybe an hour (including the stewing time).
In a deep pan that has a lid, heat up a big glug of olive oil, and fry the diced onion at a medium heat for 3-5 minutes to soften. Then add the chopped tomatoes. Stir and let it cook for a minute or two, then add the dates/prunes, 1 cup of veg stock, the honey, and a handful of almonds. Put the lid on, bring to the boil, then turn the heat right down to a simmer.
Chop the aubergine into big pieces, maybe 1 inch cubed. Don't go smaller than that. Put the aubergine in a bowl and sprinkle over a good dose of cinnamon, maybe 2 tbsp. Toss this around to coat the aubergines fairly evenly.
Get a big frying pan and put it on a hot heat. (No oil.) Add the aubergine pieces. Let them dry-fry for maybe 6 minutes, tossing them occasionally to turn over. A couple of minutes before they're done, slice the lemon into 0.5 cm slices, remove the seeds, and cut the slices in half (i.e. into semicircles), then add the lemon slices to the dry-fry pan. This gets them a little bit browned too. If you're increasing the quantities, you'll need to do the dry-frying in batches.
Put the aubergine and lemon into the stew pot. Add a good twist of black pepper, as well as the cumin and bay leaf. Stir around. Now put the lid back on and let this bubble gently for maybe 20 minutes minimum, 40 minutes maximum.
About ten minutes before the end of the cooking time, add a handful of chickpeas.
Then, just before serving: taste to check the sweetness, and decide whether to add a bit more honey. Add 1 tbsp olive oil, and stir. Then finally sprinkle some more sliced almonds over.
After a tip-off from a friend, I've had a couple of different attempts at doing a nice simple meal with courgette fritters. This one is working well so far. I keep the courgettes in pieces (rather than grating them) which maintains the nice structure with the squishy middle bit, and the egg coating helps to make them into little parcels.
Takes 10 minutes, serves 2 as a light meal.
First get the courgette ready. If you rinsed it, pat it dry with kitchen paper. Cut it into 1cm-thick slices and put them on kitchen paper to dry a bit more.
Put a large frying pan on a medium-hot heat, and put a good slug of vegetable oil in it, a couple of millimetres deep.
Mix the flour and parmesan in a bowl. In a second bowl, lightly beat the egg. These are going to be for coating the courgette.
Take the courgette slices and toss them in the flour/parmesan. Try to get a nice even coating.
Now we fry. With one hand, take the courgette pieces one at a time, dip them in the beaten egg, turn them to coat, and then put into the hot pan. By the time you've got them all into the pan it may well be time to turn the first ones over - they need 2 or 3 minutes each side. Do the turning-over one slice at a time (e.g. using tongs), in roughly the same order that you put them in.
When the courgettes are nicely golden-brown on both sides, lift them out onto kitchen paper. In a bowl or directly on the plate, mix them with the salad leaves. Sprinkle more parmesan over them, then squeeze lemon juice over them.
Serve with crusty bread or hot buttered toast.
"Nisk" is a kurdish soup. I don't know much about it but I've modified it with a pack of beetroot to make a simple storecupboard thing that's a lovely warming and hearty soup. Takes 20 mins, serves 1 as a main or 2 otherwise:
Set up the lentils: put some hot water on them briefly, then drain and rinse them.
Heat some vegtable oil in a saucepan and start the garlic and ginger frying gently. Open the beetroot pack (carefully!), drain the liquid, and but the beetroots into bite-size pieces (eighths).
Add the turmeric to the garlic/ginger, stir once, then add the beetroot. Stir.
The rice and lentils to the pot, then add just enough stock/hot water to cover. Bring to the boil, add the dab of chilli sauce, then put a lid on and turn the heat right down.
Simply simmer really gently for 15 minutes. Then serve, perhaps with a bit of parsley. You probably don't need bread with it.
Kale and rosemary flatbread. What I particularly like about this flatbread is that the kale baked in the oven goes crispy like fried seaweed. I had it as a main course with a bit of rocket and some manchego cheese. It could also be a good accompaniment, maybe an accompaniment to something meaty.
Serves 2. It's derived from a recipe from "Crumb" by Roby Tandoh.
Combine the flour, salt, pepper and yeast in a large bowl. Make a well in the middle and add the warm water. Mix with a fork, then when that gets difficult add 1 tbsp of the olive oil and rosemary, and mix with one hand.
Knead it for 10 minutes. You might be able to do this in the bowl or it might be easier to tip it out onto a clean surface. You might need to sprinkle a bit more flour on. It should become elastic and less sticky.
Now cover the dough and let it rise for 30-60 minutes in a warm place. Meanwhile, blanche the kale: bring a pan of water to the boil and plunge the kale in. Boil it quickly for 1 minute, then immediately drain it and run cold water over it to stop it from cooking any further. Now you need to get it as dry as you can, firstly by draining it then by pressing it gently.
Knead just under half of the kale into the risen dough. It'll be a little tricky, due to the residual moisture on the leaves, but there's no need to worry about it being perfect.
Preheat a fan oven to 170C. Using a rolling pin and a floured surface, roll out the dough and then roll/hand-stretch it into a kind of A4 shape, quite thin, and put it onto a lightly floured baking tray. Put the remaining kale over the top, pressing it down a bit so that it'll stick in. Drizzle plenty of olive oil over the top and bake for 20 minutes.
Poached thai-style sea bass - a handy everyday recipe, easy to do, healthy and fresh, whenever you see a nice piece of sea bass in the shop. It takes less than ten minutes. All of the flavourings are optional really but most of them can be kept in your store cupboard.
These amounts are to serve one.
Boil a kettle.
Meanwhile chop things up: the spring onions into ~1mm slices, the chilli into ~1mm slices, the root ginger into fine slices, and chop the parsley. Don't chop the lemongrass, but bruise it (bash it with the heel of the knife a bit). Don't chop the lime leaves.
Put all the flavourings (not the coriander/parsley) into a pan with a small-soup-portion of boiled water and bring it to the boil. Add the noodles, then add the seabass so it sits on top of them (it should still be submerged though). No need to stir anything.
Turn the heat right down and put a lid on. Let it poach for about 5 minutes.
At the end, ladle the whole lot into a soup dish, ideally keeping the fish in one piece sitting on top. Sprinkle the coriander/parsley on.
This is my approximation of the lovely dry-fried paneer served at Tayyabs, the famous Punjabi Indian place in East London. These amounts are for 1 as a main, or more as a starter. Takes about ten minutes:
First put the cubed paneer into a bowl, add the curry powder and cumin and toss to get an even coating.
Get a frying pan nice and hot, with about 1 tbsp of veg oil in it. Add the onion and chilli (and cumin seed if using). Note that you want the onion to be frying to be crispy at the end, so you want it finely sliced and separated (no big lumps), you want the oil hot, and you want the onion to have plenty of space in the pan. Fry it hot for about 4 minutes.
Add the paneer to the pan, and any spice left in the bowl. Shuffle it all around, it's time to get the paneer browning too. It'll take maybe another 4 minutes, not too long. Stir it now and again - it'll get nice and brown on the sides, no need to get a very even colour on all sides, but do turn it all around a couple of times.
Near the end, e.g. with 30 seconds to go, add the squeeze of lemon juice to the pan, and stir around. You might also like to sprinkle some garam masala into the pan too.
Serve the paneer with chive sprinkled over the top. It's good to have some bread to eat it with (e.g. naan or roti) and salad, or maybe with other indian things.
A baked germanic cheesecake with blackberries and lemon curd. Yes please. Makes a cheesecake for 12 slices.

Put the oven on at 180C. Line a round springform cake tin (7" diameter maybe) with greaseproof paper.
Crush the biscuits roughly in a bag, and melt the butter/marge in a pan or in a microwave. Mix the biscuits and butter/marge well then press it into the tin, forming an even base all the way to the edges. Put in the oven for 10 minutes, then take it out and leave it out to cool. If you have time, put it in the fridge for up to an hour to firm up.
Turn the oven down to 140C.
Beat the quark, cream cheese, icing sugar and two egg yolks together.
Whisk the egg whites to stiff peaks. Then fold them gently into the quark mixture, with a wooden or plastic spoon, taking care not to over-mix (which would take the air out).
Now to assemble the thing in layers:
Now bake this in the oven, for about 90 minutes. (Cooking slowly, at 140 rather than 180, is so that it doesn't brown on top, or at least not much.) Turn off the oven and let the cheesecake cool in the oven, with the door ajar (cooling it slowly helps prevent cracking, though when using the blackberries it's quite unlikely you'll avoid all cracking). Refrigerate.
Serve with some blackberry coulis if you have more blackberries! Not necessary though. It's great as-is - ideally you should get it out of the fridge a while before you eat it so it isn't too chilly.
VARIATION: Cranachan cheesecake
The traditional Scottish dessert of cranachan involves raspberries, oats, cream and whisky, so let's do something like that! Follow the recipe above but:
It's always good to have recipes for those packs of cooked beetroot. So let's have a nice simple soup. Serves 4 to 5 people, takes about half an hour:
On a medium heat, heat up a blob of marge in a deep saucepan with a lid. Roughly slice the onion and add it. Then add the cumin seed and stir. Slice the garlic and add that. Add salt and pepper. Let that all fry gently to soften, for about 5 minutes.
Roughly chop the tomatoes and pile them on top. Boil the kettle and add enough hot water so that it only-just-about covers the things in the pan (maybe 1/2 a cup). Stir, then put the pan lid on, turn the heat down to low, and let it bubble gently for 15 minutes.
Cut the beetroot roughly into chunks, add it to the pan and stir. Take the pan off the heat. Let everything cool for a minute, then carefully ladle it all into a big blender. (I say carefully because you still want to be careful about beetroot stains!) Whizz it all up, briefly so that there are no pieces left but it's still kinda thick. Return it to the pan.
Warm it up again, adding the milk at the end - not too much, just enough to slacken it and give it a touch of creaminess.
Serve with bread and butter.
At our local International Supermarket they do some great turkish delight. However, the batch I bought recently tasted funny - I think they must have stored the turkish delight alongside a big mound of parsley, because it had obviously absorbed some flavours which didn't really suit it!
So what can you do if your turkish delight has absorbed some flavours? Make it absorb some more!
So I experimented with tea-smoking the turkish delight. I was nervous that something weird would happen in the wok (I've never tried warming up turkish delight before...) but it turned out fine and the smoky flavour works well.
Actually I'd like them a bit more smoky than they are, so you might want to increase some of the proportions here:
Get a wok (or similar) and put a layer of tinfoil in.
Rip open the teabags and pour their contents onto the foil. Then add roughly equal quantities of rice and sugar. Mix it up a bit with your fingers. Put the wok on a medium heat. It'll take a few minutes until it starts smoking.
Meanwhile, you'll need something into the wok which will hold the turkish delight well away from the heat, but will allow the smoke to circulate. Maybe some sort of steaming pan. I used a thing for stopping oil from spitting at you.
Don't put the "thing" into the wok yet, keep it to one side. On top of the thing, put some tinfoil and put the pieces of turkish delight onto that. Space them out, and make sure the foil won't stop smoke from circulating.

When the tea has started smoking, put the thing-and-foil-and-delight into it, and put a tight lid on top. (You could use foil, if you don't have a good lid.)
Turn the heat down a bit and let the thing smoke gently for about 15 minutes. Don't peek inside! You don't want the smoke to escape! After 15 minutes, turn off the heat and just leave the pan there for a couple of hours to let the process continue.
When it's all finally done, open the pan - in a well-ventilated area. Take the delight out, and sprinkle with a bit more icing sugar to serve.
Leftover haggis is great for salads. This time I put it with apple - a bit less jazzy than my haggis and orange salad but still a great easy lunch. Serves 1 to 2:

Cook the pasta, then drain it, refresh it in cold water, and leave it to one side for a bit to cool down.
Peel the apple and slice it into matchsticks.
In a bowl, break up the haggis with a spoon or a fork. Mix the apple into it. Then add everything else and mix it together.
Over the bank holiday we happened to discover a massive trove of BLACKBERRIES! Now of course I'm not going to tell you the exact location - let's just say it was somewhere in the southern half of the UK ;) and we got a massive haul of lovely blackberries:


So we now have many blackberry-oriented puddings ahead of us. To make the most of the freshly-picked blackberries I wanted to make pavlova with blackberries and blackberry coulis. So Philippa's mum kindly told us the secret to her delicious pavlova. My photography here is amateur but trust us this is delicious:

So here's the recipe. The amounts I've written are for a "small" pavlova to serve two. If you change the amounts you'll probably need to adjust the cooking time.
I've got to say, and I know this sounds poncey, but it's not really worth bothering with shop-bought blackberries. We've had them now and again and they always look nice but there's somehow no flavour to them. (Philippa's mum makes it with shop-bought raspberries and that's good. It's really the blackberries I'm on about here.) So, while it's the season, if you can find some blackberries to pick, then take the opportunity, and make this:
Pre-heat the oven to 150C.
First you need to whisk the egg whites almost to stiff peaks. For this, follow all the usual meringue advice: you'll need a spotlessly clean bowl (because oil or alkaline can cause it to collapse), and I add a dab of vinegar to the bowl to be sure. Add the egg whites and then whisk them almost to stiff peaks. Add half of the sugar and whisk it in.
Then mix the other half of the sugar with the cornflour. Sprinkle it over the meringue mix, and do the same with the vanilla and the vinegar. Using a big wooden or plastic spoon, fold everything in, until it's mixed and the brown streaks have disappeared. Take care not to over-fold it or the air will go out of it - better to stop a little too soon than a little too late.
Put a sheet of baking paper on a big baking tray, and pour the mixture onto it, making a rough circle. Level it off with the back of the spoon, so it's maybe an inch thick.
Put this into the pre-heated oven for 40 minutes. Then turn off the oven and leave it to cool, without opening the door. This helps prevent it from cracking. After about 30 minutes, or maybe longer, it's probably OK to open the oven door. Then leave it to cool to room temperature, a good hour or so at least.
[...time passes...]
When you're ready to have your afters, prepare the blackberries and coulis etc - it doesn't take a sec. Rinse the blackberries gently. Put half of them onto the plates you're going to serve them on (pick the best-looking non-squishy ones if you have the patience). The other half, put them in a (mini-)blender with the icing sugar, and whizz them up. Then push this mixture through a sieve and collect the lovely dark purple coulis into a serving jug below.
Serve however you like, but each person will want a slice of the pavlova meringue, a load of the fresh blackberries, a generous drizzle of coulis and a couple of scoops of ice cream.

Haggis and orange - why of course! This salad serves 2. The red wine vinegar really helps the flavours marry, and the beansprouts add a nice bit of crunch - if you're being posh you could also/instead add some pomegranate seeds.
In a large bowl, break the haggis into small pieces with a spoon. The haggis we had was a little dry so I also added a dab of oil at this point.
Now prepare the orange. First, with a zester, scrape off about 1/4 of the orange's zest, into the haggis. Then, with a knife slice the top and bottom off the orange, then stand the orange on a chopping board and slice off the rest of the peel. Then cut the orange into segments, and cut each segment in two, so you have little bite-sized bits. Pick out any pips. Add the orange pieces to the haggis, and also tip in the small amount of juice from the chopping board.
Add the rocket and the beansprouts, and mix. Add the olive oil and red wine vinegar and mix it to dress evenly. You won't need to season much, since the haggis brings a lot of seasoning.
Serve with toast.
This clementine cake is lovely and juicy, with a nice sweet chewiness to the crust. And look at that crumb:
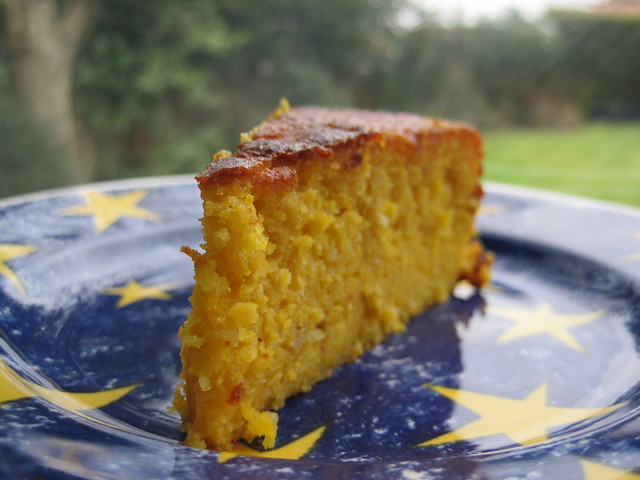
When I took the next photo I accidentally left the flash on - but it does show off some of the bright orange colouring in the cake:

It's an easy cake to make. Cos of the juiciness it doesn't keep for that long... but that's no problem. If you have a pressure-cooker it really speeds up the bit where you cook the clementines (or tangerines, or whatever).
Ingredients:
Put the clementines (WHOLE AND UNPEELED, but without any stalky bits) into the pressure cooker, or a big pan with a lid. Add cold water to cover. If it's a pressure cooker, put the lid on, bring it up to pressure, and cook for 15-20 mins. If it's a normal pan, simmer gently (covered) for 2 hours.

Then turn off the heat, release the pressure, and let the clems and the water cool down. You have to let them cool before the next step, so the clementines don't scramble the eggs! Here's a picture of our clems cooling on the back step.
Put the clems into a food processor and blend them up. (It's handy to keep some of their cooking water in case the mixture needs a bit more liquid, but in my experience it's generally not needed.)
Crush the cloves in a pestle and mortar. Add the flaked almonds and crush them too. No need to crush the almonds too fine - the point of the flaked almonds is to give an occasional bit of crunch to the cake.
In a mixing bowl, whisk the eggs, then mix in the clementines. Then add everything else, and mix it up.
Pour into a 21cm springform tin (greased, and with baking paper in the bottom) and bake at 180 degrees (gas mark 4 or 5) for about an hour. Cover the cake loosely with greaseproof paper or a tray, for the last 20 minutes or so.
Take out of the oven and let it sit in the tin for 10--20 minutes or so, before turning it out onto a wire rack to cool properly.

This recipe used HFW's "tabula kisir" recipe as a starting point, but I adapted it to approximate a nice tabbouleh I've had in the good lebanese place. As usual, I make no claims to authenticity - but in my opinion there shouldn't be too much wheat (or else it comes across like a boring old couscous), and it should have a nice acid tang - in my version the lime does that really nicely. I didn't have any tomatoes in the house but you could easily add a single diced tomato too. Serves 2, takes about half an hour in total.
Put the bulgar wheat into a large bowl (it will look like not very much!), and add just enough boiling water to cover. Put a plate over the top and leave it to steam for 20 minutes. Meanwhile, there are a few other bits you can prepare in parallel:
Wash the spring onion and the parsley and put them to one side.
Put a dry frying pan on a hot hob, and add the walnuts. Toss them around in the pan occasionally until they smell nice and toasty. Then turn off the heat and put them to one side.
Also make up the dressing. Juice the lime into a small dish or glass. Then add the chilli flakes, cumin, paprika, and tomato puree, and whisk it up with a fork. Then add the olive oil and whisk it up again. Finally mix the dressing in with the bulgar wheat, and if it hasn't already cooled completely then leave it a little while more.
Chop the spring onion finely, and the parsley too. Add them to the bulgar wheat, and add the walnuts too. It's also nice to add a little bit of peel from the lime. Mix it all around, and leave it at least a few minutes for the flavours to mix together.
I've been experimenting with rhubarb, looking at nice ways to cook it in the oven without stewing it first (so it keeps its shape). Here's a rather nice one: rhubarb in the hole.
These amounts serve 2. Should work fine if you double the amounts - you just need a roasting tin big enough to sit all the rhubarb in with plenty of space.
In a mixing jug, beat the egg then add the milk and beat again. Add the salt and 3 tsp sugar and beat again, then gradually whisk in the flour to make a medium-thick batter. (This is normal Yorkshire pudding batter but slightly sweetened.)
If you can, leave the batter to sit for about 30 mins, then whisk again.
Put the oven on at 200 C. Grease the roasting tin / Yorkshire-pudding tin and put it in the oven to preheat.
Rinse the rhubarb and cut it into 8cm (3in) pieces. On a chopping board or in a bowl, mix the rhubarb pieces with the ginger preserve to get them nice and evenly coated. Sprinkle the other 3 tsp sugar onto them.
Assembling the pudding can be a bit tricky - mainly because you want to work fast, so the tin stays hot. Get it out of the oven, then wobble it around to make sure the grease is evenly spread just before you pour in the batter. Then place the rhubarb pieces in (probably best to do it one-by-one) so they're evenly spread but they're all a good couple of centimetres away from the edge.
Immediately put this all back in the oven and bake for 20-25 minutes. The batter should rise and get a nice golden-brown crust.
You can serve it on its own, or with a small amount of ice cream maybe.
(I had expected it to be a bit dry on its own, but actually the fruit keeps it moist so the ice cream isn't compulsory.)
Classic combination this, but when asparagus is in season it's a lovely light lunch to base around a handful of asparagus. Serves 2, takes 10 minutes, and NB it involves a raw egg so it's not for anyone preganant.
Put a griddle pan on a high heat to warm up. Put the bread in the toaster on a light setting. (The plan is to ignore when it pops up and leave it in the toaster while preparing the other stuff, which gets the bread a bit dry and crispy which complements the other stuff well.) Separate the egg, putting the yolk in a small mixing bowl, and put the white in the fridge/freezer (we don't need it). Shave/slice the cheese finely.
Put the asparagus in the hot griddle pan (lying perpendicular to the lines of the pan). Sprinkle a small amount of oil onto the asparagus. Let it cook for 5--7 minutes or so, turning halfway through, and meanwhile make the mayonnaise as follows.
Add the mustard powder, vinegar and garlic to the yolk, and mix it all in with a whisk. Add a tiny drop of olive oil and whisk that in until it's well blended. Add another bit of olive oil and whisk it in again. Keep doing this until you've added about 2 tbsp oil (after the first couple of drops, you can start adding slightly larger amounts at a time). Taste it, and adjust the flavour if wanted. Keep whisking and adding a dab more oil until it reaches a slightly gelatinous mayonnaisey consistency.
When the asparagus is almost ready, put the toaster down and let it warm the bread up for another 20 seconds or so. Then slice the toast in halves, and arrange each plate with toast and asparagus, sprinkling the cheese over the asparagus and then adding a blob-or-drizzle of mayonnaise over.
A simple lentil supper that happens to have a nice variegation of good strong flavours. Serves two, takes 40 minutes.
Put the lentils in a sieve and rinse them under running water.
Heat up 1 tbsp olive oil in a pan and start the onion and the cumin frying. After a couple of minutes, add the garlic. After another minute or two (maybe you're taking this time to chop the carrot) add the carrot and the asafoetida. Stir around and allow to fry a bit more. Overall, the onion etc should have been frying for 5 minutes or so before the next step.
Add enough boiling water to just cover what's in the pan, and let it boil strongly for a couple of minutes. Then turn the heat down to a simmer, bung the thyme in, and put a lid on.
This is now going to simmer for almost 30 minutes but halfway through we'll add the mushrooms. So about halfway through, heat up a frying pan with 1 tbsp olive oil in, peel and slice the mushrooms, and fry them quickly for a minute or so - no need to overdo it. Then bung the mushrooms in with everything else, and also the beans if you have any. Now is a good time to wash and chop up the parsley.
When the food is almost ready to serve (not much water left in the pan, and the lentils are almost soft, but still with a bit of a bite), add the parsley and 1 tbsp olive oil and stir through. Then serve.
This is a nice way to use pumpkin, a spicy and warming pumpkin pasta dish. These quantities serve 2; takes about 45 minutes in total, with some spare time in the middle.
Put the oven on hot, about 210--220 C. Peel and deseed the pumpkin, and slice it into slices about 1/2 cm thick and 4 or 5 cm long - no need to be exact, but we want thinnish pieces. Chop the chilli up into rings too.
In a roasting tin, put a good glug of olive oil, then the pumpkin and chilli. Sprinkle over the paprika and turmeric, then toss to mix. Put this in the oven and let it roast for about 40 minutes, preparing the aubergine and pasta in the mean time.
The aubergine needs to be cut into pieces of similar size and shape to the pumpkin. The tomatoes, leave them whole but cut out the stalky bit. Halfway through the pumpkin's cooking time, add the aubergine, another glug of olive oil, toss briefly to mix, and sit the tomatoes in the middle somewhere, then put it all back in the oven.
Cook the spaghetti according to the packet instructions (e.g. boil for 15 minutes). Drain it, and get the other stuff out of the oven. In the pan that you used for the pasta (or a new pan), put the two roasted tomatoes and bash them with a serving spoon so they fall apart and become a nice lumpy paste. Add the pasta to them and mix. Then add the other roast vegetables, and mix all together, but gently this time so you don't mush the veg.
Serve with some parmesan perhaps.
This aubergine casserole was made extra nice by making a topping out of some leftover stuffing we had in the fridge. Serves 2, takes about 45 minutes.
Preheat the oven to 200 degrees C. Get a wide frying pan with a bit of depth, warm it up on the hob with some olive oil in.
Chop the aubergine into half, then slice (about 1cm slices), and start them frying in the hot pan. After a couple of minutes, turn them over - they'll have sucked up a lot of oil, so many be add some more. Slice the chilli up and add it to the pan.
After a couple more minutes of frying, add the tinned tomatoes. Let the mixture bubble down a bit while you drain the beans, and rinse the parsley and chop it up finely-ish.
Add the beans and parsley to the pan. Stir. Let the mixture bubble for another couple of minutes.
Now, transfer the whole mixture to a deepish ceramic pot. Crumble the stuffing over the top (it doesn't need to form a "complete" crust, just a topping) and pour another good slug of olive oil over the top. Cook in the hot oven (uncovered) for 20 or 25 minutes, until it's developed a nice crustiness.
This is basically a dhal, but the clear lemon+chilli flavour makes it a bit different from the curry flavour when you make a dhal usually. If you're not comfortable with hot chilli, reduce the amounts in here. Serves 2.
Heat some oil in a non-stick saucepan which has a lid. Chuck the cumin seeds in and let them fry quickly until they darken and smell fragrant. Add the diced onion and the chilli, stir briefly, and add the garlic paste and the carrot.
Add the lentils, stir, then add enough boiling water to cover and give maybe another half-to-one centimetre depth of covering. Chop the lemon in half, squeeze out its juice and add it to the pan.
Stir. Put the lid on the pan, turn the heat right down, and let it bubble gently for about half an hour. Stir it at some point during this time.
When it's ready it should be pretty dry - it will be in danger of sticking to the pan, which is why I sid use a non-stick pan. Stir it round, sprinkle in the fresh parsley and maybe a bit of garam masala too.
Serve with a couple of hot chapattis per person.
Unusual combination but surprisingly delicious: sausage, beetroot, mint. This is a straightforward stew but these robust flavours make it a fab one-pot meal. Takes about an hour (but you have loads of spare time once it's started cooking), serves 3.
In a big deep pan that has a lid, heat up two tablespoons of olive oil on a medium heat. Bung in the sausages and get them frying. The sausages should start to brown nicely fairly quickly.
Put the kettle on. Peel the potatoes and chop them into big chunks. Stir the sausages occasionally while you're doing this, but don't worry too much. Peel and chop up the garlic and add that to the sausages, stirring around.
Add the potatoes to the pan, then add enough boiling water to just cover. Add the thyme. Stir all around a bit, then put the lid on, turn the heat down, and leave it to bubble gently for 30 minutes.
Take the pack of cooked beetroot, open it, pour any spare beetroot juice into the pan, chop the beetroot roughly into big chunks and add it to the pan. Wash the mint leaves then tear them up roughly and throw them into the pan too. Stir all around (some of the sausages might break, don't worry), turn the heat up a bit, and let this all bubble for another 15 minutes. Add a bit of black pepper if you like.
By the end the potatoes should be very soft and starting to thicken the mixture up a bit - they should pretty much collapse when you prod them with your serving spoon. Dish it up.
A semi-improvised and non-traditional spinach+paneer curry that came out particularly well - the lime flavour zings the top of it nicely. Makes 2 big portions; takes about 20 minutes.
In a good-sized wok, heat up some oil and add the cumin seeds. Swirl them around and then add the onion and coriander. Let this fry for 2 or 3 minutes (while you chop the garlic maybe) then add the garlic and mix it all around. Let this fry for 2 or 3 minutes more until the onion is nice and soft and then add the chopped tomatoes. Give this a stir then let it simmer gently for 5 minutes or so while you do the next bit.
Heat about 2mm of oil in a frying pan. Chop the paneer into bite-sized cubes. Put the flour and 2 tbsp garam on a plate, then toss the paneer around in it to coat. Then fry the paneer in the hot pan, giving it maybe 2 or 3 minutes before turning it all over and giving it 2 or 3 minutes more. It should fry to a nutty sort of brown colour.
While the paneer is frying, add the juice and zest of the 1/2 lime to the tomato mixture. Tip the paneer onto a plate with a piece of kitchen roll on (to drain some of the oil off). Pile the spinach into the wok - you'll need to add a large volume, cos it shrinks as it cooks - and stir it in, then add the paneer and stir that in too. Let it cook together for a minute or so.
Serve it all with the 1 tsp garam sprinkled over at the last minute, with some alfalfa on top, and warm chapatis.
This is a fairly straightforward mixture of oriental flavours which complements a nice piece of fish really well. Serves two.
Spread the flour out on a plate and generously salt+pepper it. Then coat the fish fillet in it, and leave it there for now. Wash the lettuce.
Get a boiling pan of water and cook the noodles until just done (3 or 4 minutes). While that's happening, warm up a wok or frying pan to a hot heat with a dab of oil, and also warm up a frying pan to medium-hot with a good covering of oil.
Drain the noodles in a sieve. Let them dry off while you slice the garlic and stir-fry it in the wok for a minute of two. Then add the noodles and mix it in, still stir frying.
Chop the lettuce up, and put the tougher stalkier half of the bits in the wok. Stir. Chop the lime in two and squeeze one half into the wok. Stir fry briefly then take it off the heat while you fry the fish.
Put the fish fillets gently into the other pan and fry them for 3 or 4 minutes either side. While waiting for the fish to finish, spoon the noodles onto two plates as well as the lettuce. Sprinkle a little soy sauce over.
When the fish is done, drain it on some kitchen roll briefly before putting it on the plates. Then squeeze the remaining lime over everything.

Philippa is pretty darn good at cheesecake, and this is one of the best - I suggested the honey and ginger combination and she used it to make a fab cheesecake (based originally on her mum's recipe I think). It was semi-improvised so this recipe is a reconstruction...
It uses quark which I hadn't really heard of until recently, but it's the secret to amazing germanic-style cheesecake. It's a bit like cream cheese but it's not. Make a fab cheesecake!
Preheat the oven to 180ºC. Line a baking tin (7" diameter maybe) with greaseproof paper.
Bash the ginger biscuits up into dust (e.g. put them in a bag and hit them with a rolling pin). Melt the margarine in a pan and mix the crushed biscuits into it, then put the mixture into the lined baking tin. Spread it around to make a smooth even base and press it down - the aim is to make the base layer for the cheesecake.
Bake this base in the preheated oven for 5-10 minutes while mixing the other ingredients up:
Beat the eggs briefly. (Or if you have the patience, separate the eggs and beat just the whites, before adding the yolks back.)
Add the quark, sugar, almonds, honey and ginger to the quark. Mix it all together. Take the tin out of the oven, pour the mixture on top, and return it to the oven to bake for about 50-60 minutes. When it's ready it will brown a little on top and won't wobble much when you nudge it. Take it out and let it cool completely before serving.
Nutritional information
I worked out these estimates, just to see if this counts as a relatively 'healthy' cheesecake:
1 slice (out of about 10 slices per cake) contains about 8.4g fat (of which 1.6g saturates, 4g monounsturates, 2.3g polyunsaturates), 24.9g carb, 657 kJ (157 kcal) energy, 0.2g salt, 0.8g fibre.
Percentagewise by weight this is roughly 9.8% fat (1.9% saturates, 4.8% monounsaturates, 2.7% polyunsaturates).
Plum ketchup is a great autumn recipe. I'm publishing it now (spring) cos I made up a big batch of plum ketchup to make christmas presents this year - and I think it went down pretty well... I think it's well nice, at least! Goes especially well on sausages or fish.
Put tomatoes, plums and onions in a large saucepan with the spices. Bring to the boil and simmer gently for 45 minutes or until the onion is soft. (Don't be tempted to add water, the fruit+veg will start to produce enough liquid after a few minutes.)
Cool the mixture for 10 minutes, then blend or process it until smooth. (Some would remove the spices before blending but I don't.) Then strain through a sieve back into the pan.
Add remaining ingredients, stir over a gentle heat (do not boil) until the sugar dissolves. Simmer uncovered until the mixture thickens to the right consistency (about 15 minutes, stirring occasionally).
Pour the hot ketchup into hot sterilised bottles or jars, and seal while hot.
(This is based on a standard tomato ketchup recipe, but with half the tomatoes replaced by plums, and some cinnamon added to complement the plum flavour.)
The shop had some nice-looking mackerel fillets on offer today so here's how I cooked it - and it was blimmin nice! The combination was deliberately made with the vinegar and onion to balance against the oily mackerel and that worked just great. Serves 2, takes 10 minutes.
Turn the grill on to a medium setting, and put a frying pan on a medium heat.
Chop the onion and start it frying in a good slug of olive oil in the pan. Let it soften while you put the makerel fillets and the tomato (chopped in half) onto some greased foil and then under the grill. The mackerel takes about 10 minutes - put it skin-side down at first then turn it half-way through.
Meanwhile, once the onions have softened a bit, add the vinegar, stir, and turn the heat down to very low so the onions can stew gently.
Mix the lemon zest into the cous cous in a bowl, add boiling water to cover, and put a lid on. Let it stand for about five minutes until everything's just about ready. Then stir the cous cous with a fork before serving it all up.
This is an easy quick salad for one:

I was challenged this evening with two ingredients: a stick of lemongrass and a box of pollack (white fish). So I've never tried it before, but it turns out that a tom-yum style soup is actually quite easy. I didn't have all the posh ingredients that I should have done (e.g. fish sauce) but we do have a bag of lime leaves in the cupboard, and the lime leaves give a really nice flavour.
It's a one-pot meal if you stick some noodles in the pot as well - here's what I did (serves 2):
(By the way - if you're not into hot flavours, reduce the amounts of the chilli and the ginger.)
Finely chop the ginger. Bash the lemongrass up and down with the butt of your chopping-knife. This helps release the flavour.
Put the water in a pan and bring it to the boil. Put in the lemongrass, lime leaves, chilli flakes, ginger and sugar, then turn the heat right down and let the mixture sit warming gently for 10 minutes to infuse.
Meanwhile, wash the button mushrooms, and chop the pollack into big bite-size pieces. Add the pollack to the pan, and turn up the heat. (When you add the fish it cools everything down, so you need to bring it back up a bit.) Add the mushrooms too, and when the water's bubbling again, turn the heat back down to a low setting.
Put the noodles into the broth (push them to the bottom so they'll soak nicely). Now let everything cook gently for about 6 or 7 minutes.
I haven't had kedgeree for ages, but somehow it felt like the right thing for a hot summer evening's teatime yesterday. This was partly based on memories of my mum's kedgeree and partly on some online recipes. Serves 3 or 4 people.
In a pan, heat up some oil. Chop the onion up and add it to the pan, with the curry powder. Fry the onion gently until softened, then pile the rice on top. Stir it all around, then add boiling water to come about half a centimetre above the top of the rice. Bring to the boil, stir once, then put the lid on and turn the heat right down. You'll be leaving this for about 25 minutes to cook gently, adding the frozen peas in the last five minutes so that they warm up.
In the meantime, hard-boil the eggs. (I put them in a pan of boiling water, took them off the heat, left them for 12 minutes to cook, then plunged them into cold water to stop them cooking.) Give them time to cool down a bit.
Break the mackerel into flakes, trying to pick out any noticeable bones as you do so.
When the rice+onions+peas is done, stir it with a fork to fluff the rice up. Peel and quarter the eggs, then gently mix the mackerel and eggs into the mixture.
In York I bought a really good book about Northern English food - From Eccles Cake to Hawkshead Wig: A Celebration of Northern Food - and read about "Ormskirk gingerbread". Never heard of it before (nor been to Ormskirk) but it sounded like a good recipe so I made some for the dorks at dorksnow and they went down very well.

By the way, I added brazil nuts to the recipe, which is totally and utterly non-traditional but I fancied it. You can include them or leave them out - I've done both ways, both are good, but I recommend adding the brazil nuts.
Cream the marge and sugar together with a fork. Add the golden syrup too.
Sift the flour and ginger and cinnamon in. Be generous with the ginger, and stingy with the cinnamon - you don't want the cinnamon to be noticeable.
Also add the brazil nuts. It's OK if there are some larger bits of brazil nut, that adds to the texture.
Mix it all together well, then shape with your hands into flat rounds, say roughly about 1cm thick and 6cm across.
Lay them out on a floured baking tray and bake at 170ºC for 25 or 30 minutes, until they just turn a baked colour. They'll burn easily so don't overdo them. Apparently a "falling heat" is a good way of doing them: I tried both ways, a constant temperature the whole time, or turning the oven off halfway through, didn't notice much difference.
Put them on a wire rack to cool. (This stage is important cos that's when they firm up and get that nice crunchy texture on the outside, while still being cakey in the centre.)
This made 18 nice big biscuits when I did it.
I was searching around for a decent sticky toffee pudding recipe to add to the Wikibooks UK Cookbook. Ended up making this recipe today, based on recipes I read online. It was dead nice.

Note: Finely chopping the dates helps make a really gooey cake - but some people prefer to chop the dates roughly, so that they're more obvious in the finished pudding.
For the cake
For the toffee sauce
Method
Serve with cream, custard, or ice-cream.
A couple of days ago I made the Hairy Bakers' brown ale bread. It's pretty nice (but I recommend you only use half as much cheese as they do!).
It's the kind of bread that goes best with a nice light soup so here's what I made, it's nice (serves 2 or 3):
Warm up the veg oil and marge in a big pan, while you chop up the onion. Add the onion to the pan and leave it for a few minutes on a low heat, to soften - don't let it brown. Peel and chop the garlic and add that half-way through.
Add the cardamom pod and the fennel seeds to the pan and stir it all around. Rinse and roughly chop the cabbage then add it to the pan. Also add the brown ale and hot water, just enough to almost cover everything.
Bring it to the boil, put the lid on and turn down to a very low heat. Let it bubble for 15-20 minutes.
Take the pan off the heat, add the frozen peas, and stir it all around. The frozen peas will have lowered the temperature enough to be safe for the blender. Put about three-quarters of the mixture into the blender and blend it until nice and smooth (won't take long). Return this all to the pan - so you should have the smooth liquid combined with the remaining lumpy bits - that makes a nice texture.
If necessary, put it back on the heat to warm it up slightly, before serving with brown ale bread and butter.

I would never make gnocchi myself (tried it once, it took hours and wasn't worth the effort), but you can get packets in the supermarket which take literally 2 minutes to boil so it's really handy. Normally we make them with a tomatoey sauce (like a pasta sauce for example) but here's a nice light summery way to do them. Serves 2 and takes less than 15 minutes from start to finish.
Warm up some oil in a pan. Slice the onion as finely as you can and add it to the pan. While it fries for 3 or 4 minutes (stir occasionally), chop the tomatoes into dice. Add the tomatoes and the wine to the pan. Once this starts bubbling, let it bubble for a minute or two before turning the heat right down to minimum and putting a lid on. Let it cook gently for about 5 minutes.
While the sauce is cooking prepare the gnocchi according to the pack. When they're ready, drain them and stir them into the sauce. Serve it all with a few salad leaves on the side.
This is really easy to make, given how posh it looks coming out of the oven. Serves 2 or 3 people for lunch. It's a pastry-less quiche which makes it much simpler to do, and a bit healthier too probably.
Preheat the oven to 180ºC, and grease a metal baking tin of some sort whose edges go up at least one inch. (Or you could use a ceramic pot, probably wise to preheat that in the oven if so.)
Warm some marge/butter up in a pan and gently fry the red onion, with the rosemary sprinkled on top, stirring occasionally. It'll take about 10 minutes to soften nicely, so while that's doing, steam the asparagus: chop it into 3--5cm pieces (use the whole asparagus except for the hard bit right at the base) then put it in a sieve and suspend over boiling water for 5 minutes. Then run some cold water over the asparagus to stop them overcooking, and set to one side.
Whisk up the eggs, milk, salt & pepper, and parmesan cheese, whisking for about 3 or 4 minutes so there's plenty of air in the mixture. Then tip the onions into this mixture, and pour the mixture into your baking tin. Then put the asparagus in/on the top of the mixture, spreading them out in a nice even layer.
Bake at 180ºC for 25 to 30 minutes until it's looking nicely coloured on top. I served it with spinach & tomato salad, plus bread & butter.
More beetroot fun, this time using one of those sealed packs of cooked beetroot rather than raw beetroot (much quicker to cook).
This soup is a delicious thick soup, filling and with a nice warm sweetness from the spices and the beetroot. (The spices are important for the flavour, by the way.) Serves 2 to 4, takes about half an hour but only 10 minutes of work.
Heat up a tablespoon of olive oil in a deep saucepan, and start the onion frying. Add the cumin and turmeric. Chop the garlic and add that too, and stir and fry for a few minutes until it all smells softened and pleasant.
Add the uncooked rice and stir it in briefly just to let it catch some of the flavours.
Open the bag of cooked beetroot. Put the liquid into the pan if there is any, and chop up the cooked beetroot and add it to the pan too. Add boiling water to cover the contents by at least a centimetre or so. Stir it around.
Now put it all in a blender and whizz it up. (Or take it off the heat and use a hand-blender.) The rice will still be hard and it will break into small pieces rather than being completely whizzed, but try to get only just to the point where the beetroot and onion pieces are liquidised.
Return to the heat and bring it up to a boil. Then turn the heat down, put a lid half-on and let it bubble gently for about 20 minutes until the rice is cooked.
Turn off the heat, stir in a tablespoon or two of plain yoghurt (optionally) and serve.
Beetroot is in season so I tried cooking with beetroot this week. (Fresh, I mean, not cooked/pickled.) It's tricky cos it can be rock-hard if you cook it as if it was potato or something. Just now I found a nice trick: you can treat it as if it was onion and use it as the basis of a stew. Frying it in olive oil at the start softens it nicely and flavours it nicely too; then if you make a wine/tomato stew on top of it, the slight acidity of the wine/tomato complements it nicely.
This recipe serves 2 and takes about 40 minutes all included. If you want more protein in it, adding beef (browned first) or chick-peas, after the garlic, would work really well with the flavours.
Warm a deep pan with the olive oil in. Chop the stalks off the beetroot, then peel them (using a knife is probably easier than a peeler, since beetroots are a bit soft). Chop them into thin slices (2mm thick?), then chop the slices into matchsticks. Put these into the pan and allow the beetroot to fry gently for 5 mins or so. In the meantime, peel and slice the garlic, and wash the cauliflower and cut it into big bitesize pieces.
Add the garlic to the pan and stir around. Also add the cauliflower. Let these fry for a minute or two until the garlic has softened. (If adding beef/chickpeas, do it at this point.) Add the chopped tomatoes and enough hot water to cover the cauliflower bits, and bring it to the boil. Add the wine, stir things up, and continue to boil for a minute or so (to let the alcohol boil off the wine).
Put the lid on and let the stew bubble gently for 25-30 minutes. Serve with bread and butter.
Matt if you're reading, you might want to avert your eyes... the onions might offend.
This was a surprisingly nice and easy lunch just now:
In a frying pan or wok, heat a little oil and fry the diced onion on a medium heat for 3 or 4 minutes until starting to soften. Break the egg into the middle of the pan. Break the yolk, but you don't need to stir it all in. Using a spatula, draw the egg/onion into a neat-ish circle towards the middle of your pan (about the same size as your bread!). Sprinkle a little bit of black pepper on top, and turn down the heat a tiny bit. Let this cook for 3 or 4 minutes until the egg is set all the way through. (The onion will caramelise a bit.)
Butter your bread slices and put a layer of spinach leaves on one. When the egg/onion is ready slide it out of the pan, on top of the spinach. Let it sit for a few seconds (to let the steam escape) before putting the other slice on top. Nice sandwich.
This makes a really delicious supper to have with buttered crusty bread, and it's really easy. Serves 2 or 3 depending how hungry you are.
First things first: after chopping the feta into cubes you must dry it off so it will grill properly. Put the cubes onto a plate with a piece of kitchen paper on, and put another piece of kitchen paper on top.
Turn your grill on to its highest setting so that it can preheat while you do the next bit.
Put the mushroom pieces and courgette slices into a bowl, sprinkle the oil on top and mix everything around to get things covered well. The mushrooms will absorb the oil quite quickly so you won't end up with a very "wet" mixture.
On a baking tray with some tinfoil on, spread the feta and the courgette and the mushroom out fairly evenly. Put all this under the grill, as close to the grill as possible (about an inch away, no more). You won't need to turn the pieces over or anything like that, but watch everything very closely. It'll take about 3 or 4 minutes for the feta cheese to brown nicely on top and for the other things to start to cook.
As soon as the feta is nicely browned on top, serve everything straight away - it'll cool down quickly and it's best when the feta is still melty inside and everything's piping hot.
We buy packets of ready-made "gnocchi" (italian potato dumplings) because they're really quick to cook and they're nice. I made gnocchi from scratch once and it took hours and I got grated potato all over the kitchen. It wasn't pretty. These ready-made ones are really handy to have in the cupboard.
What you need, though, is to know how to make a very quick sauce to go with them. This evening I managed to do this one in pretty much 7 or 8 minutes because we were in a rush - and it's really nice!
These amounts are to serve two.
Start a large kettle of water boiling; and put a tablespoon of olive oil in a saucepan over a medium heat.
Rinse the tomatoes and chop them into slices. Put them into the saucepan. They'll immediately start to soften. Put the tsp of sugar on top of them (don't stir yet).
Chop the spinach roughly (it'll take a couple of minutes, giving the tomatoes time to cook) and put it into the saucepan on top of the spinach and tomato. Stir together and leave it to continue cooking.
The packets of gnocchi that we buy take about 2-3 minutes to boil: start them going now, in a separate pan, using the boiling water etc.
Put the pesto into the saucepan with the tomatoes etc. Mix it all together, and turn the heat right down to its lowest setting.
When the gnocchi are ready, drain them. Pour a tablespoon or so of olive oil over them, then mix them in with the sauce, and serve.
I got Philippa an ice-cream-making-ball for Christmas, so occasionally we get ice and salt all over the kitchen and try and make some ice cream. Here's a really nice one that we made just this weekend:
You just need to squish all the ingredients together and then freeze them, in an ice-cream maker or probably it'd work in the freezer - just stir it every 20 minutes or so, and after an hour at most it'll be frozen.
You need to squish the berries so that they burst at least a little bit and so that some of their flavour comes out into the yoghurt. If you really want them squished, the best way is to mash the sugar and the berries together, before adding the yoghurt. But it's nice not to pulverise them completely.
The slightly tart blueberries and the yoghurt make a really nice flavour together.
Really nice ratatouille is made with the different vegetables done separately, then combined. Here's an easy way to do it, by roasting them so they don't all mush together. This goes really nicely with oven chips and serves 2.
Preheat an oven to very hot - 220 or 230ºC.
Toss the vegetables in the 5 tbsp olive oil, in a big mixing bowl. Sprinkle the balsamic vinegar over and mix around. Spread them onto a baking tray and put in the hot oven for about 20 minutes, until nicely roasted.
Meanwhile, warm up a saucepan (large enough to hold everything) with the 1 tbsp of olive oil. Chop the tomatoes up and add them. Turn the heat down very low and let the tomatoes cook gently for ten minutes (or however long is left before the veg are ready).
Take the vegetables out of the oven and dump them all into the saucepan. Also add the basil leaves. Mix everything around and leave it on the low heat for a couple of minutes while you get the chips out (or whatever else you want).
My mum makes the best carrot, date, and walnut cake. It's very soft and moist with a dark sweetness (from the dark sugar) that goes really well with the other flavours - nothing like the flouncy light carrot-cake-with-lemon-icing that seems to be standard. Here's the recipe, based on a recipe in a book but completely changed. It's a very easy recipe. But despite that, I can't make it quite as good as my mum does. More practice needed:
Line an 18cm (7 inch) round cake tin with greased greaseproof paper, and preheat the oven to 180ºC (350ºF, gas mark 4).
Put the sugar into a mixing bowl and gradually whisk in the oil, then whisk the eggs in one at a time (easier to get them mixed in smoothly that way). Add the flour and cinnamon and stir the mixture well, beating out lumps to make the mixture as smooth as you can. Add the carrots, nuts, and dates, and mix.
Pour the mixture into the prepared tin and bake for about 1 hour 10 minutes, until the cake is risen and firm to the touch.
Remove from the oven, leave to stand in the tin for 3 minutes, then turn out onto a wire tray, peel off the paper and leave to cool.
Philippa likes making cake, but we had no eggs, so she found a cake recipe which works without eggs. And, remarkably, it's just like normal cake! Proper cakey consistency and everything, and nice too. Here it is, adapted from the veganfamily website:
Mix up all the dry ingredients, add the wet ingredients and mix well. At the last minute add the lemon juice and pour into a greased cake tin.
Bake at about 190C/380F for at least half an hour, or until a skewer (or a knife) comes out clean.
Two things I bought from the indian supermarket: some raw beetroot and some paneer (indian cheese) flavoured with cumin. I decided to have them for my lunch, and it turned out rather well.

It's like currying anything really: just start off by frying some chopped onion (and some cumin seeds), adding a bit of finely chopped ginger and garlic after a few minutes, then add the main ingredients and some liquid and get currying. I added the paneer first, turning up the heat to get some nice colour on it, and then after a while added the peeled and chopped beetroot at the same time as the boiling water. You need to let this boil vigorously for a while (about half an hour) so that the beetroot softens and the liquid reduces. Serve with rice and/or bread, or as a side dish, and it's very nice.
Tortilla (the spanish omelette, not the mexican bread) can be absolutely gorgeous, and it doesn't require much in the way of ingredients so it's really handy. Because of the potatoes it's really chunky, much more of a meal than your average omelette. The amounts given here serve 3 or 4 and fit nicely into a 12" frying pan when you're making it.
3 or 4 potatoes, washed (but not peeled)
1 red onion
4 eggs
4 tbsp olive oil
A handful of frozen peas
Warm up the olive oil in a frying pan. Slice the potatoes into chunks about 1cm thick and then parboil them - that is, drop them into a pan of boiling water and cook them only for about 5 minutes. While this is happening, chop the onion into thick chunks too, and break the eggs into a bowl and mix them up a bit.
Drain the potatoes in a colander or sieve, and leave them to drain while you gently fry the onion in the frying pan. When the onions have softened (3 or 4 mins?) add the drained potatoes and stir around. Leave these to fry for 3 or 4 more minutes before turning them over. Sprinkle the peas into the pan and get everything evenly spread out. Add some salt and pepper if you like. Turn on the grill to a hot setting.
Pour the eggs into the pan, trying to pour the mixture as evenly as possible. Do not stir at all from this point on! The pan should be on a medium heat as the eggs start to cook at the bottom. Let them cook for about 5 minutes. It's tricky to judge when to stop because you can't check underneath to see if they look done, but you can tell it's OK when the egg mixture starts to look a little bit cakey and set.
Take the pan off the heat and put it under the grill to cook the top (3 or 4 mins). Then turn it out onto a plate. Slice it up to serve, and have it with bread and butter and salad leaves.
Very nice combination (serves 2, takes less than 20 minutes):
2 pieces cod
1 onion or 3 shallots, sliced
1 tin chickpeas, drained and rinsed
1/2 tsp coriander powder
1 small bag of green beans
1 tbsp wine vinegar
1/2 a lime
1 beef tomato, chopped into chunks
Heat some olive oil in a wok or large pan, and also some olive oil in a frying pan. Put the onion/shallot in the wok and stir-fry it for a minute. In the meantime put the cod into the frying pan and let it cook. While it's cooking, do the following:
Add the chickpeas to the onions and stir well. Let them cook for another minute or so before adding the coriander and the green beans and stirring again.
When the cod has cooked for about 5 or 6 minutes drizzle the vinegar and squeeze the lime over. Let it cook for another minute and then take the fish out of the pan. Put the tomato into the pan and stir it around to warm it and absorb some of the vinegar/lime/fish juices - then serve.
This is nice and wholesome and filling. "Munchy" said Philippa. Serves 2 hungry people or 3 normal people.
4 or 5 sausages (veggie ones in this case, but meat or veg is fine)
1/2 onion
3 cloves garlic
1 tin pinto beans
1 tin butterbeans
1 tin chopped tomatoes
1 cup red wine
Drain and rinse the beans. Preheat the oven to 190C. Start the sausages grilling/frying so they'll get nicely browned.
In the meantime, fry the sliced onion and garlic in some olive oil for a few minutes until softened but not browned. Then add the drained beans and mix things around a bit, just until the contents of the pan have warmed back up.
Add the tomates and the wine and stir it round, and let it start to bubble. Then chop the sausages into bitesize chunks, mix them into the pan, and pour everything into a casserole dish. Cover and bake in the oven for 10 or 15 minutes.